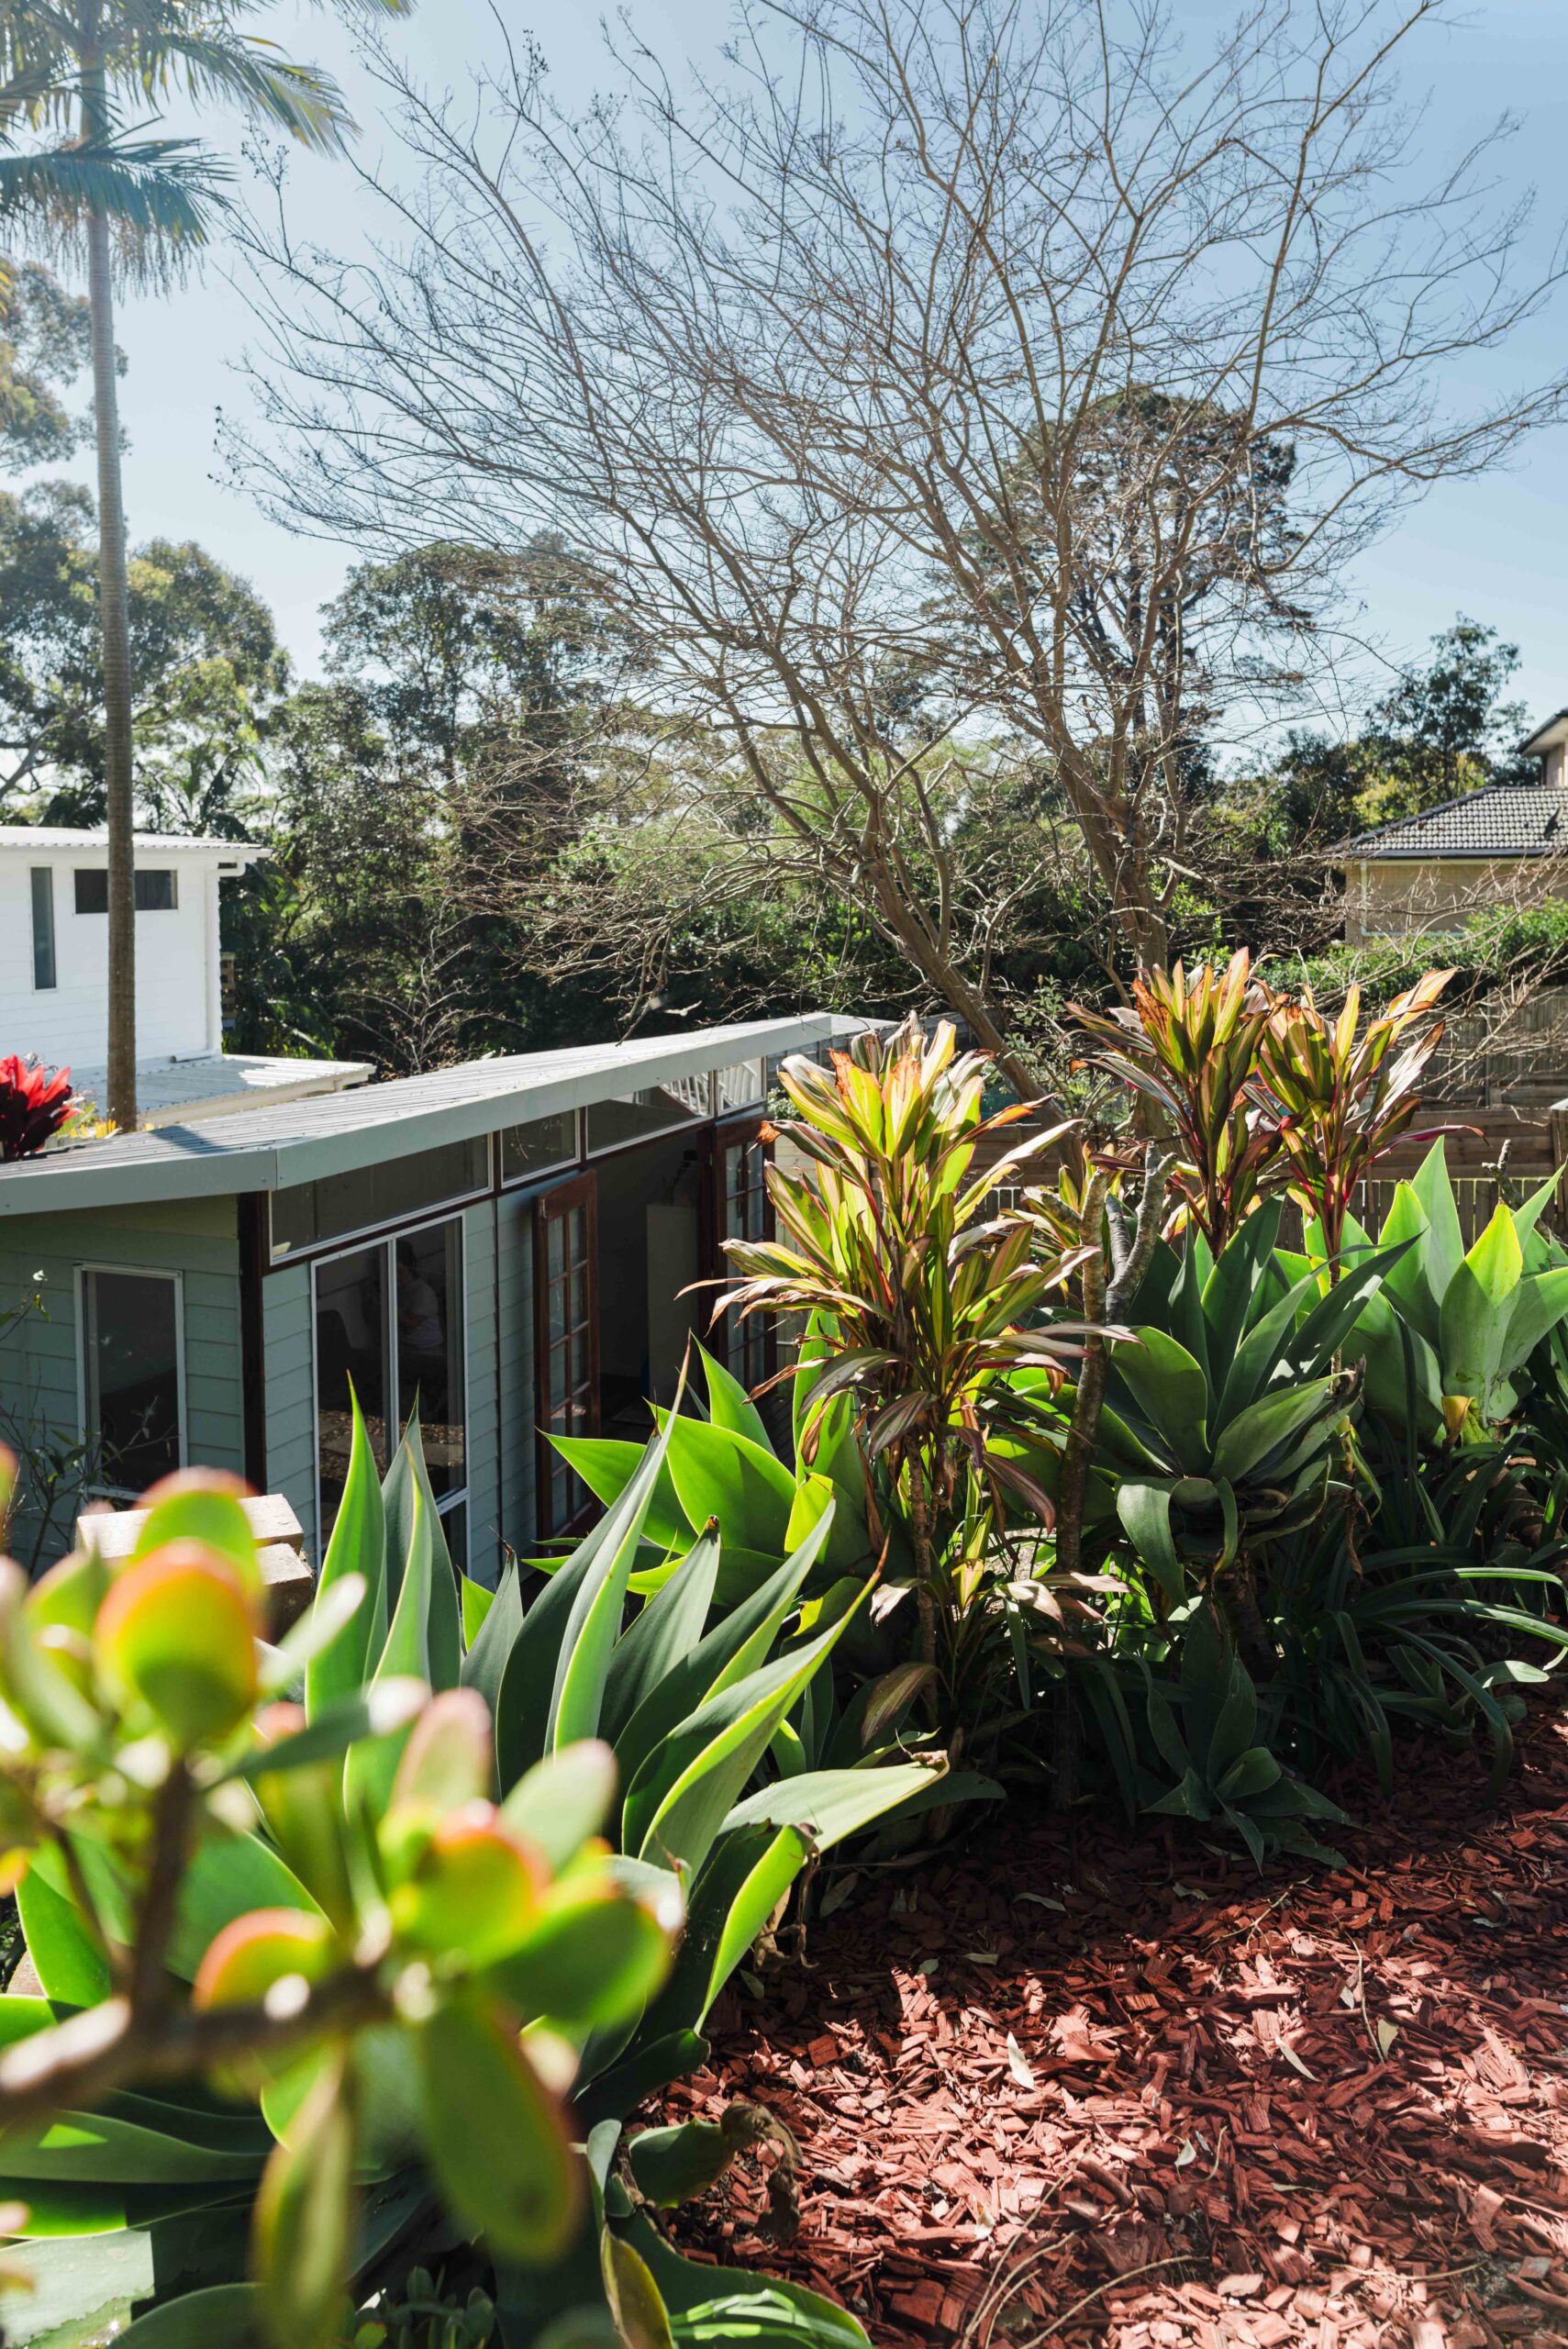
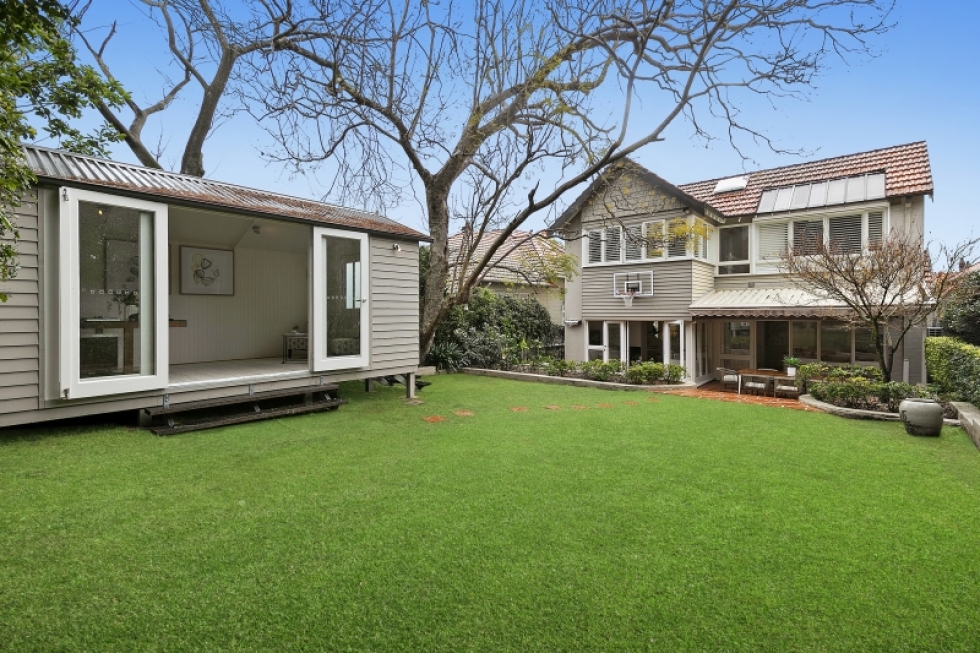
We all know the wet, unusable corner of the garden that we never like to visit.
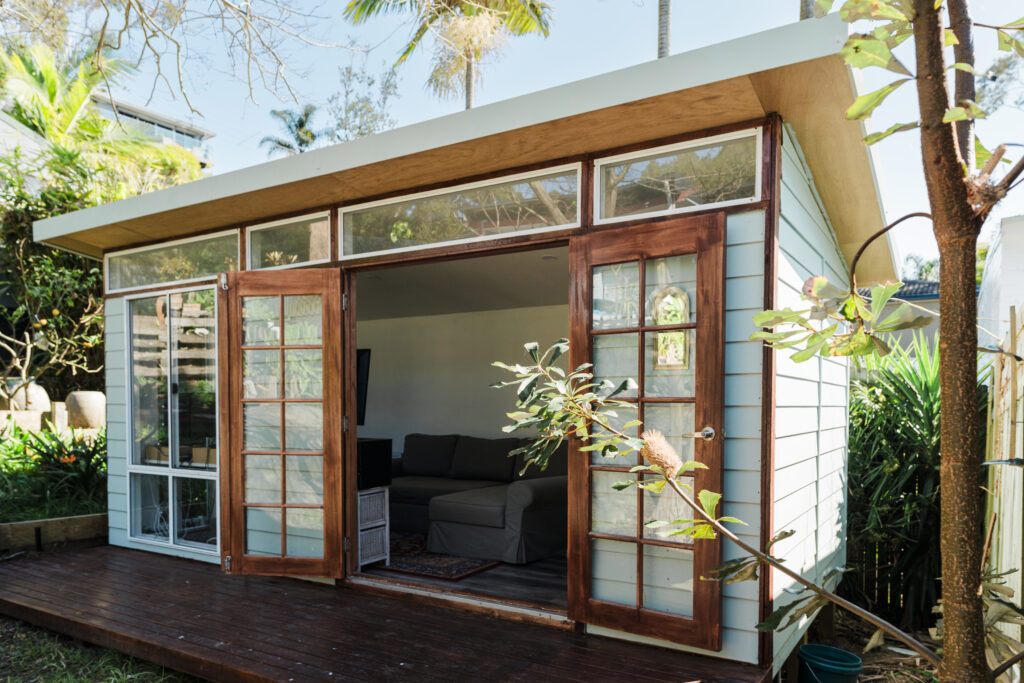
It was a waste of space. But Chris transformed it into a home office, achieving his dream of working from home without getting in the way of his partner.
“The journey to buy a Melwood was actually very good…The process could not have been easier.”
Work-life separation
Chris’ partner, is a school teacher, so she spends many hours at home during his usual 9-5 work schedule. Although they love each other’s company, when it comes to work, separate dedicated spaces for Zoom meetings and school tutoring is a must.
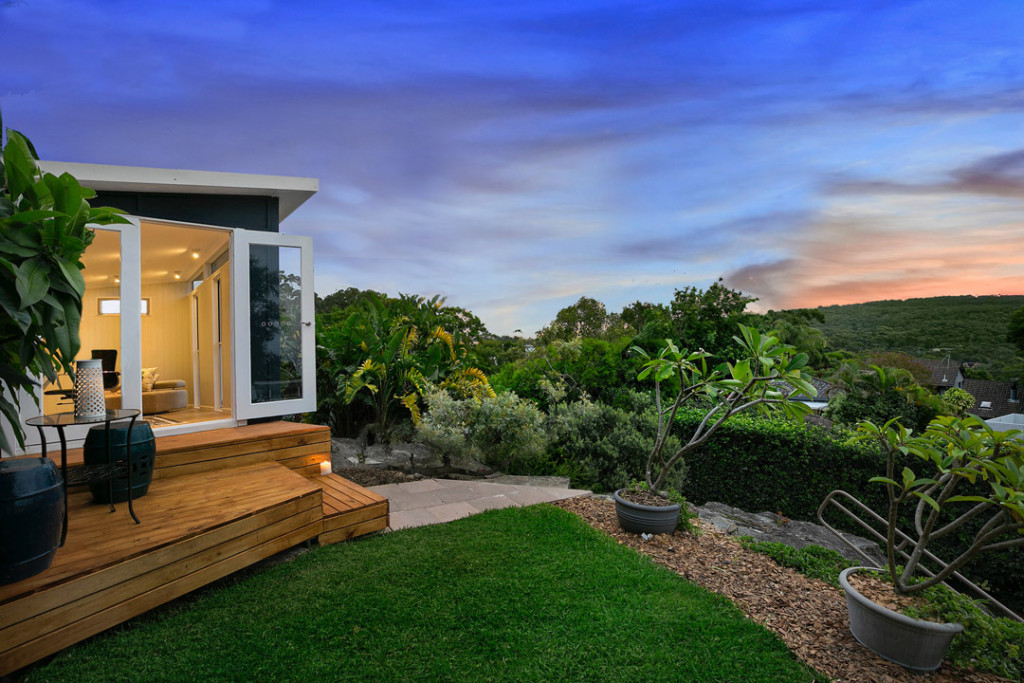
After a bit of research, Chris discovered the Melwood range of garden rooms. It was the quick and easy way to turn that dead space in the back garden into a thriving home office.
“I can now separate work from home life. When I shut down the computer at 5 o’clock and walk up to the house, I feel relaxed and ready for the next part of the day,” Chris tells us.
Daytime structure
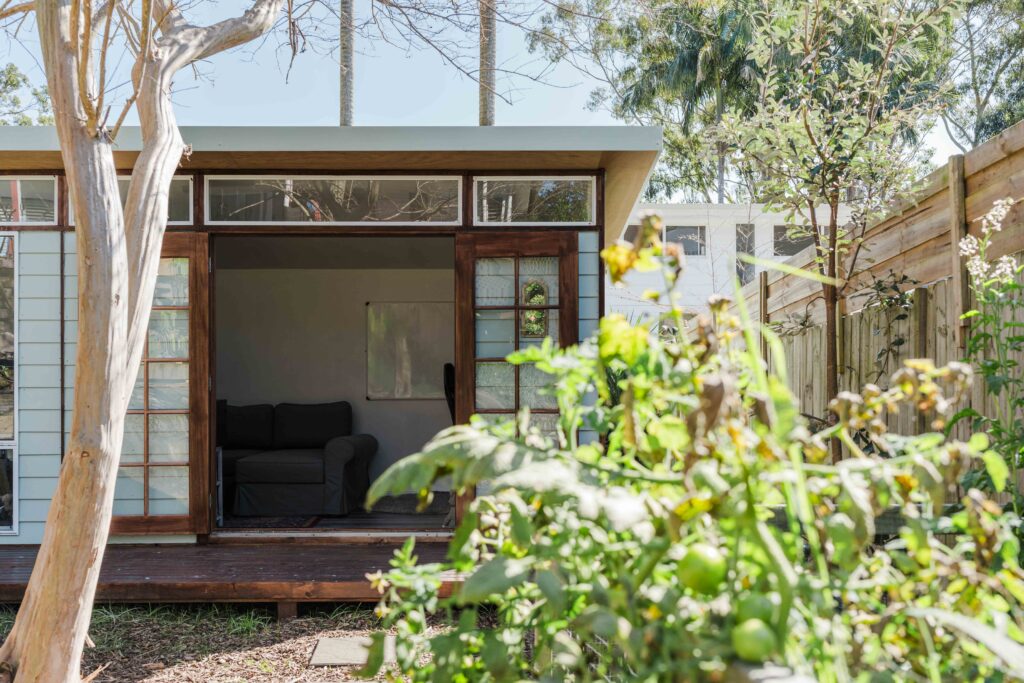
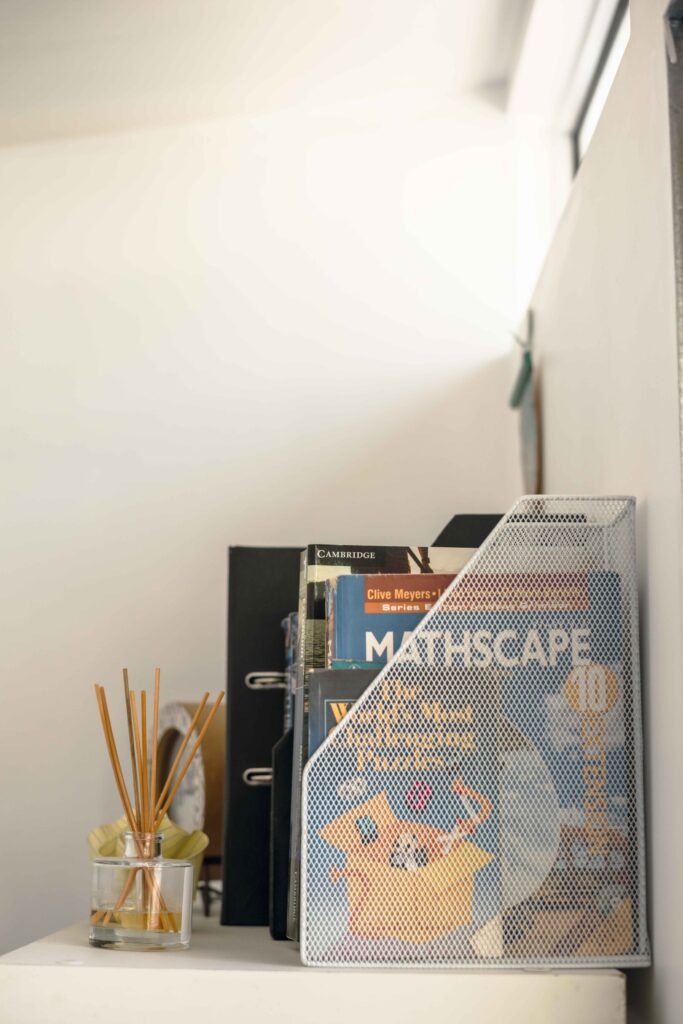
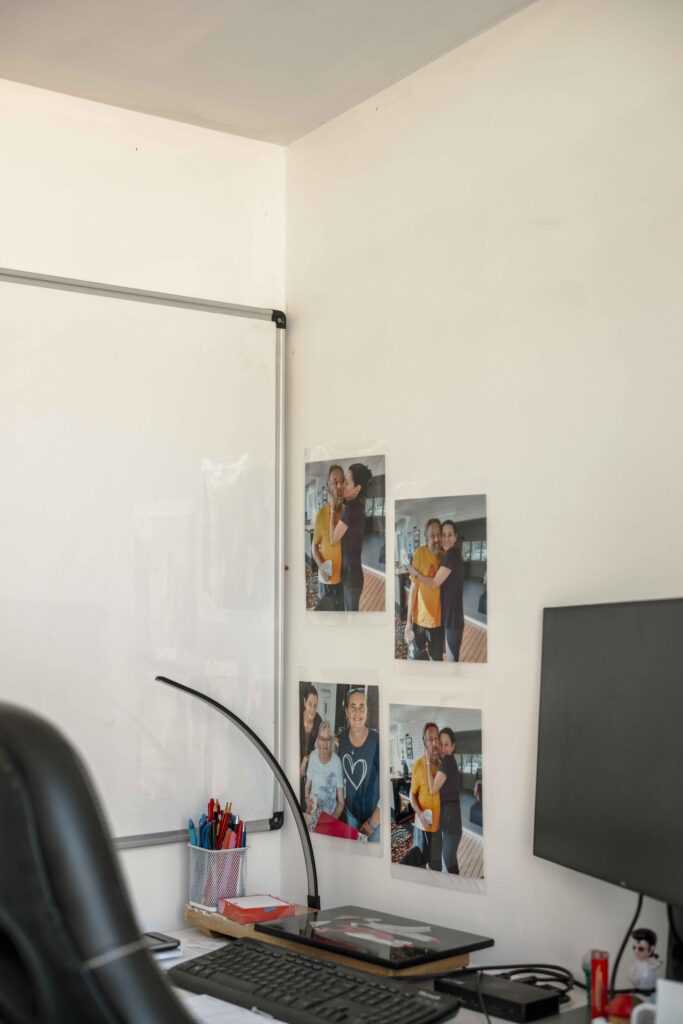
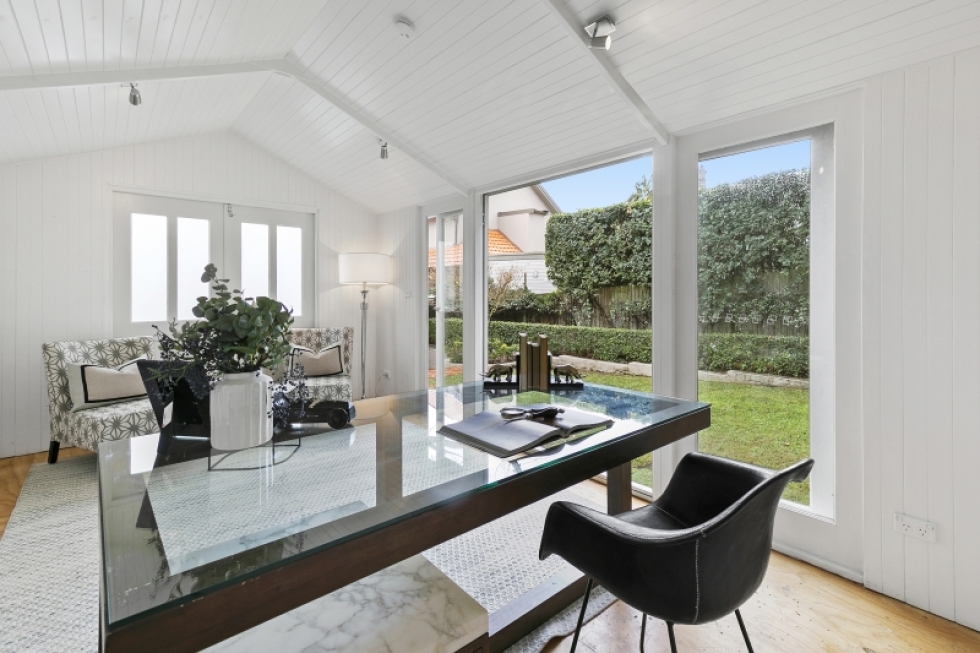
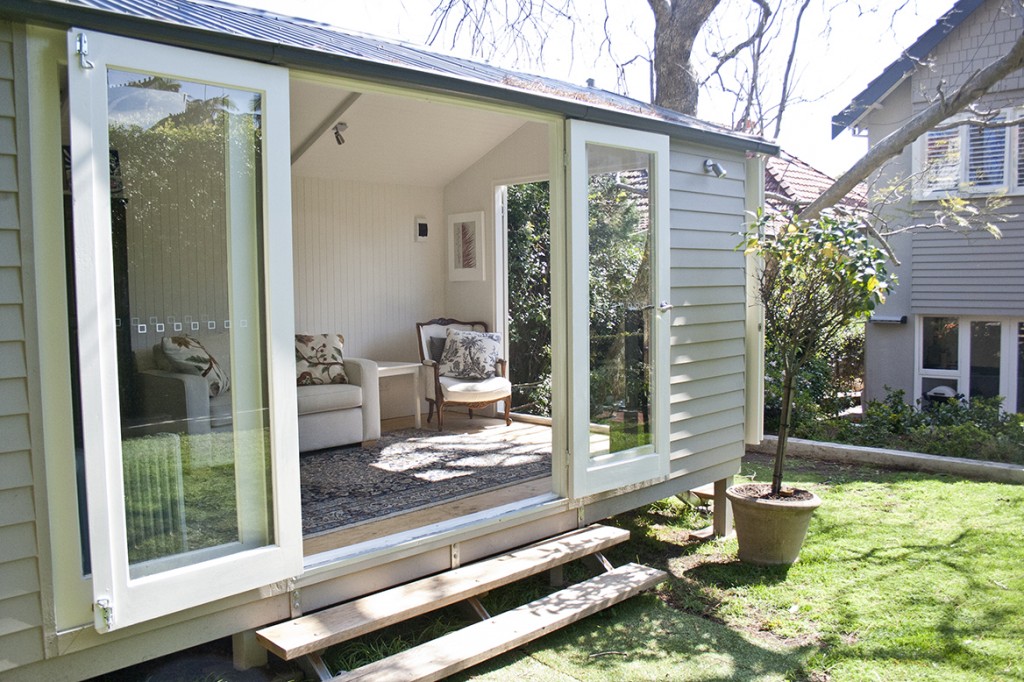
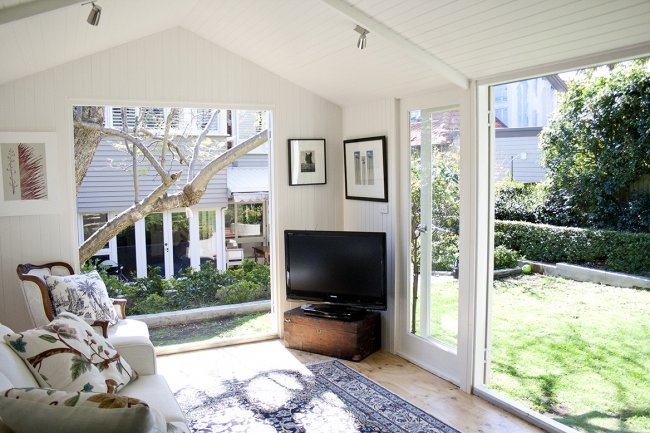
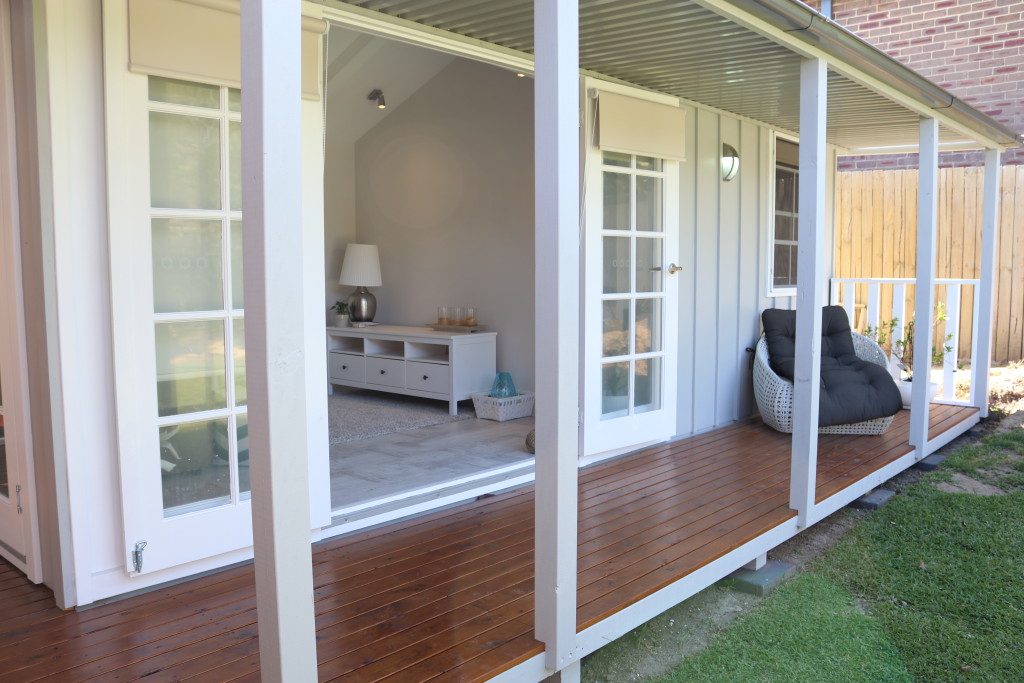
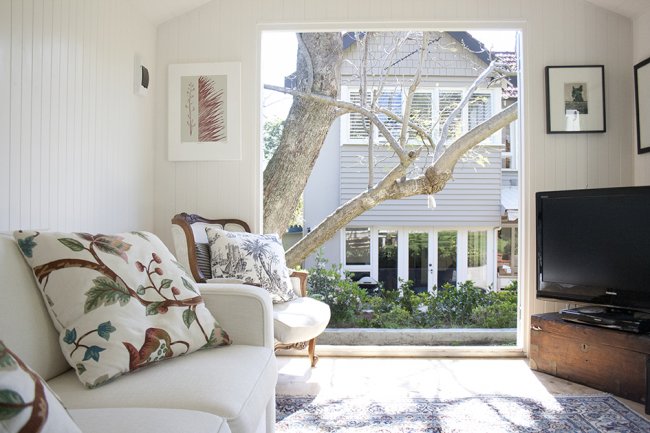
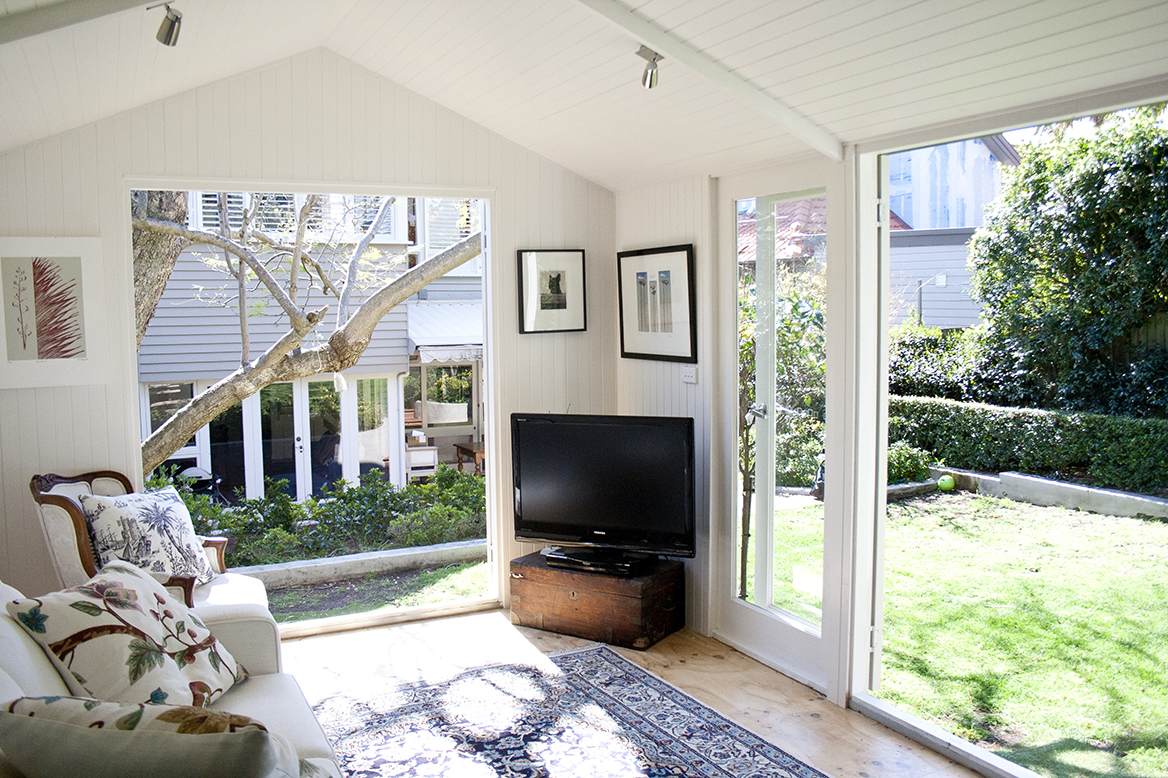
The space is filled with natural light. And to maximise this, Chris has set up his desk in front of the two large windows which overlook the sprawling garden. The other end is set up for his partner, Stella, to conduct her after-hours tutoring.
The addition of a double sofa bed and TV provides the perfect divider between the two working areas. And doubles as overflow accommodation when guests come to stay.
“It has brought structure to my days. During school holidays I am now completely out of the way,” he explains.
Chris has installed a light in the window that automatically shows when his computer is in a meeting, so everyone knows when they can disturb him.
Dead space to home office
Reminiscing, Chris looks back on his journey with Greenspan. He searched many places to try and find a good, solid solution for his home office. Ultimately, he kept coming back to his Design Solutioneer at Greenspan.
“There was never any pressure, just helpful advice. I kept ending up back with him and realised that the big selection and good prices meant that I should probably use Greenspan.”
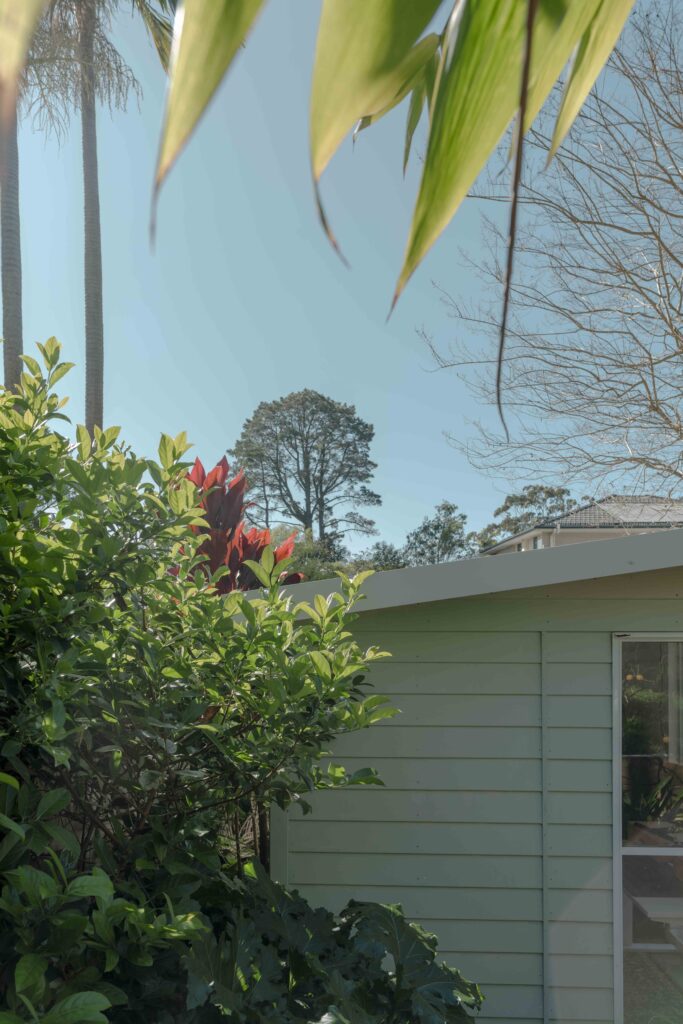
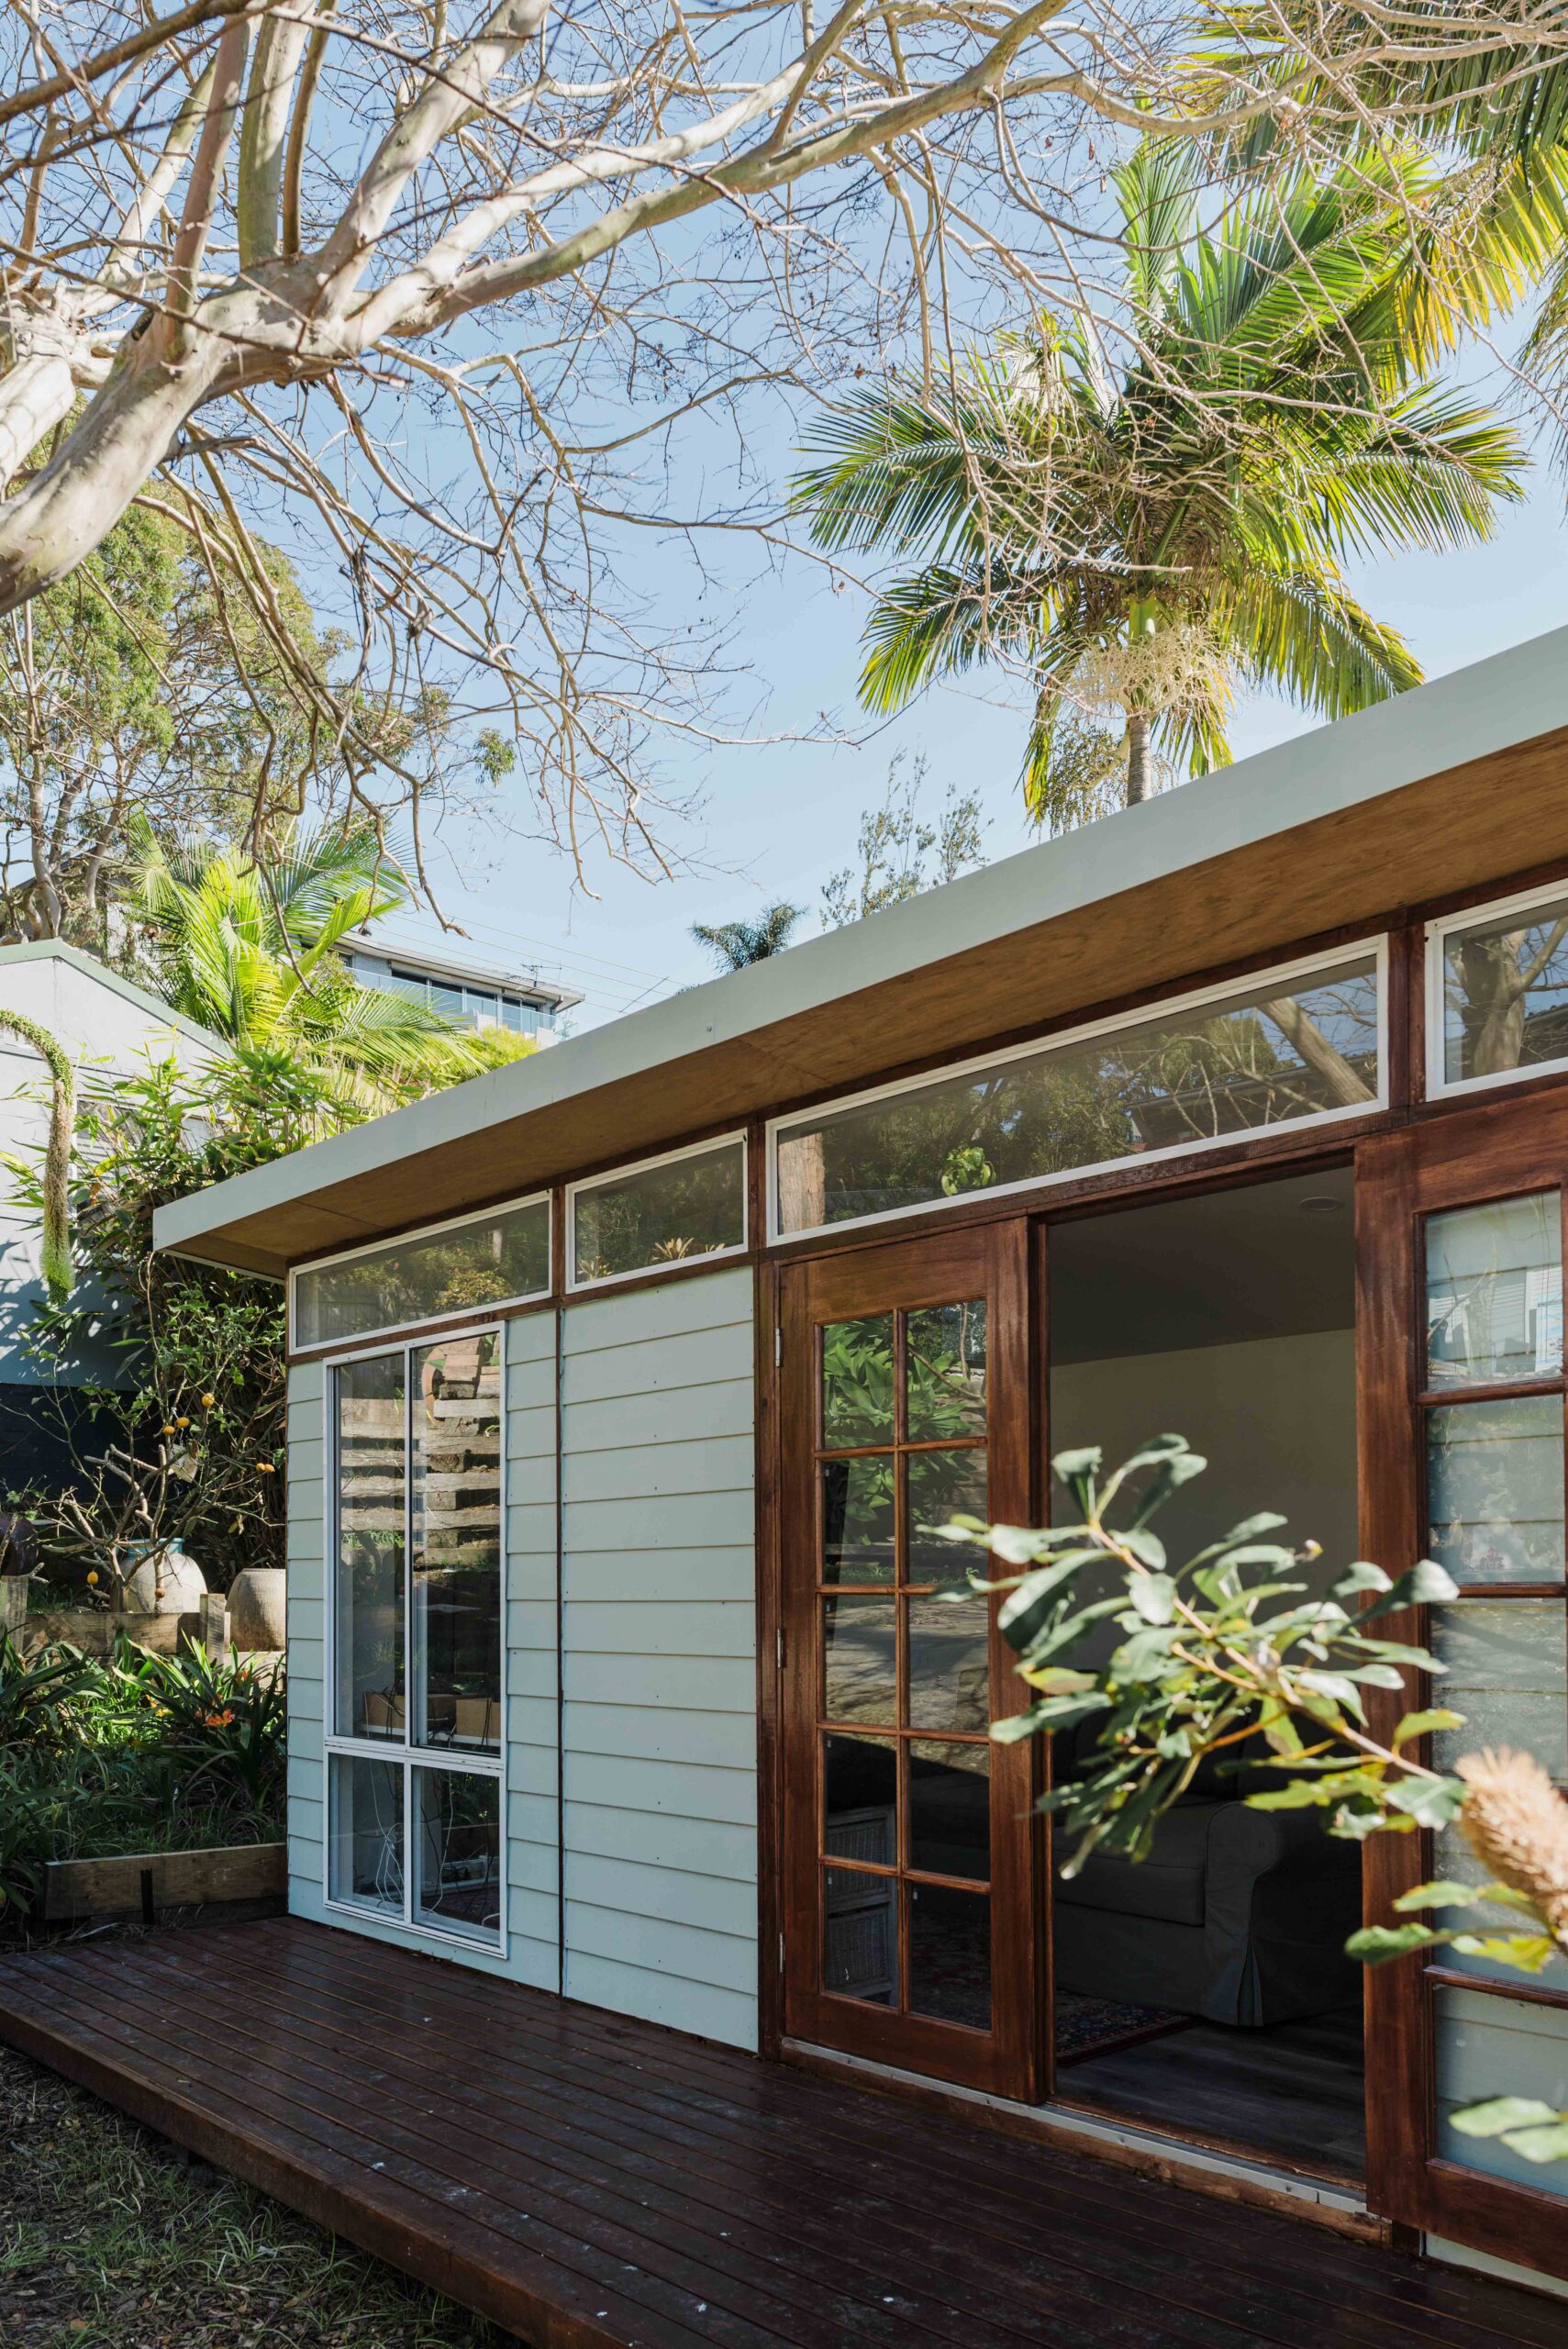
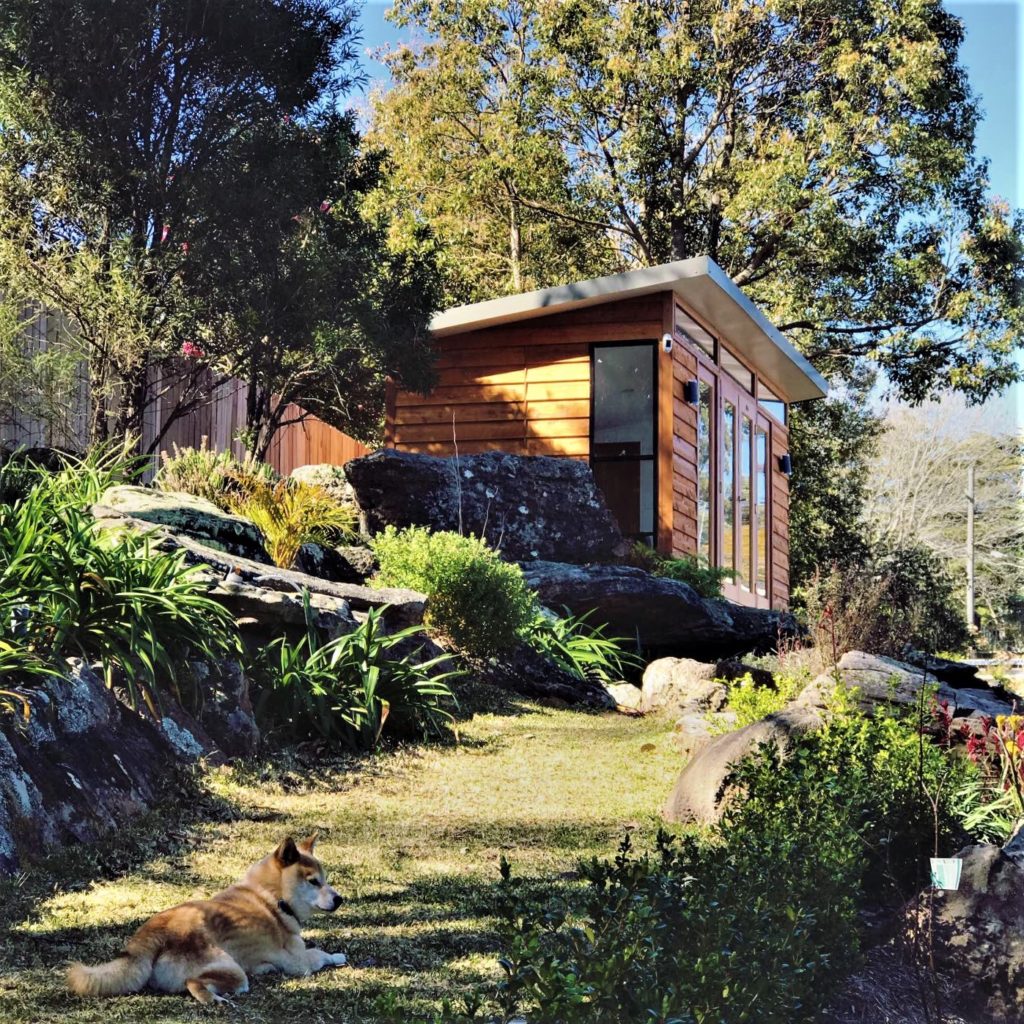
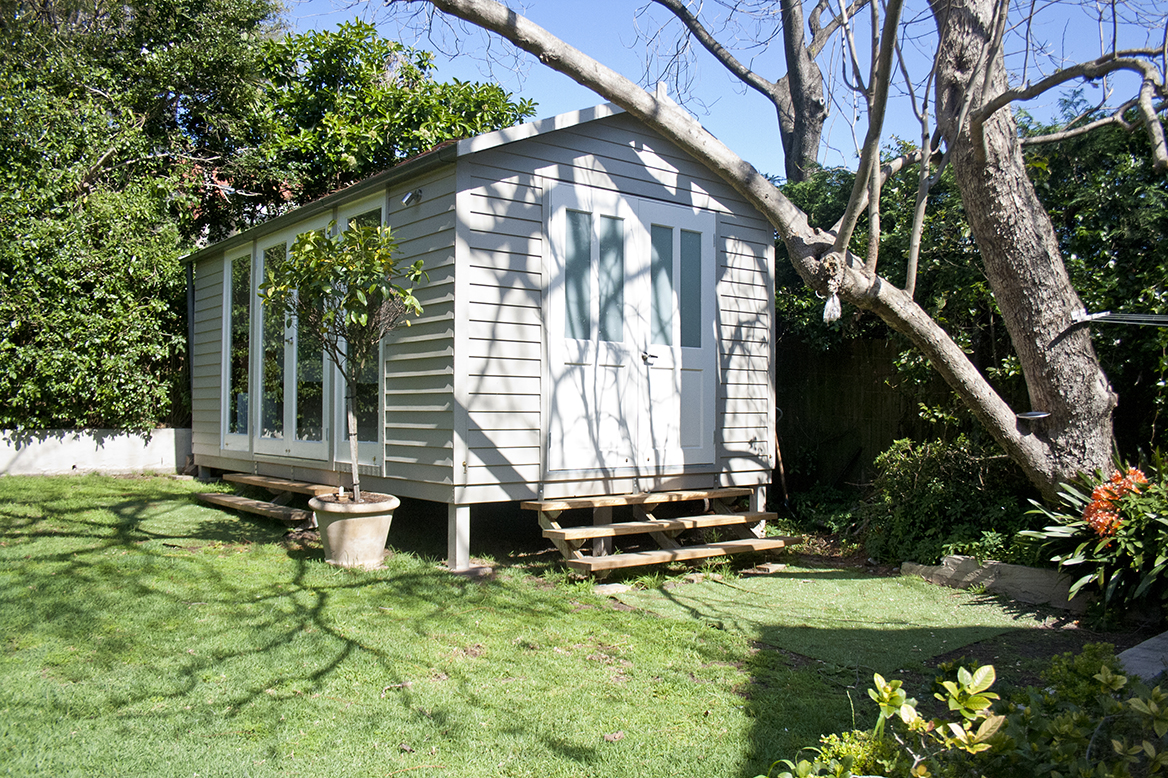
What was a wasted space in the garden, overrun with weeds, is now a lovely home office.
It has certainly increased the value of the property!
Chris chose the Melwood Mod design No. 15, measuring 5.4m x 2.6m with large windows to the front and side, maximising his view of the garden. He personalised his design with sustainable hardwood cladding and colonial style 10 lite timber doors, creating a Hamptons-inspired design aesthetic.
All measurements are approximate.
Ready to transform your dead space in the garden?
Download our Design Price Guide to find out how you can create your own home office.
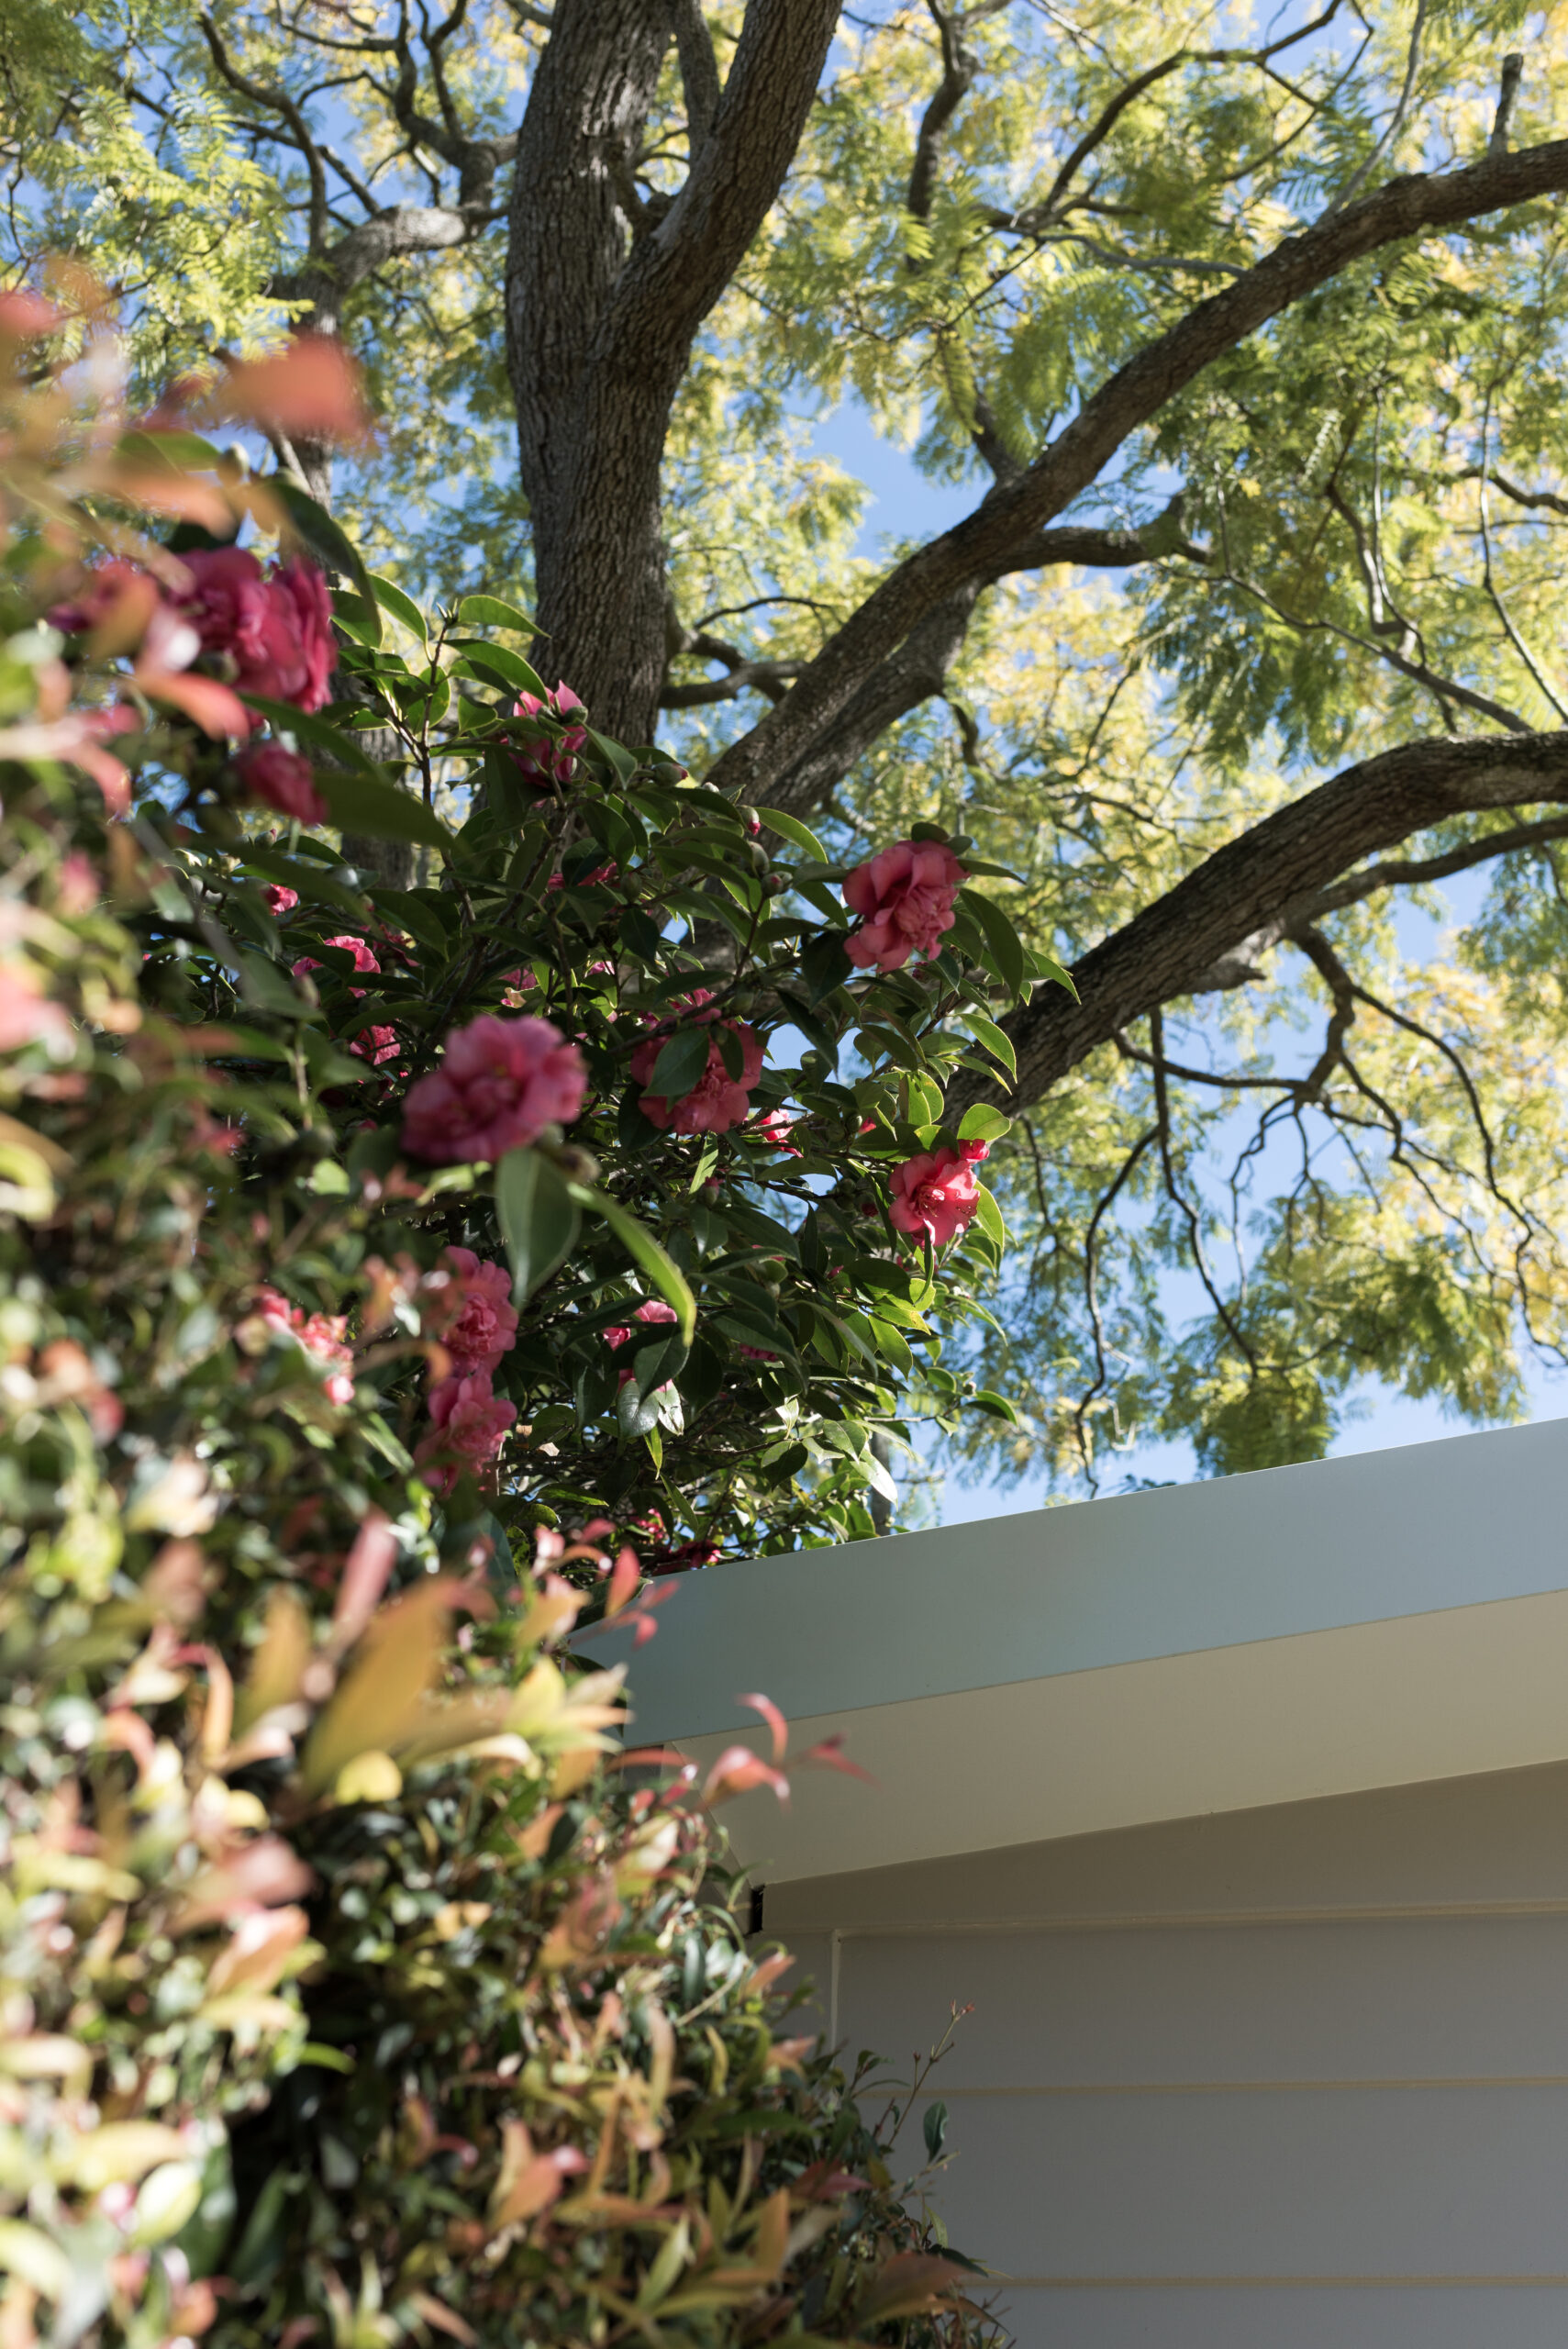
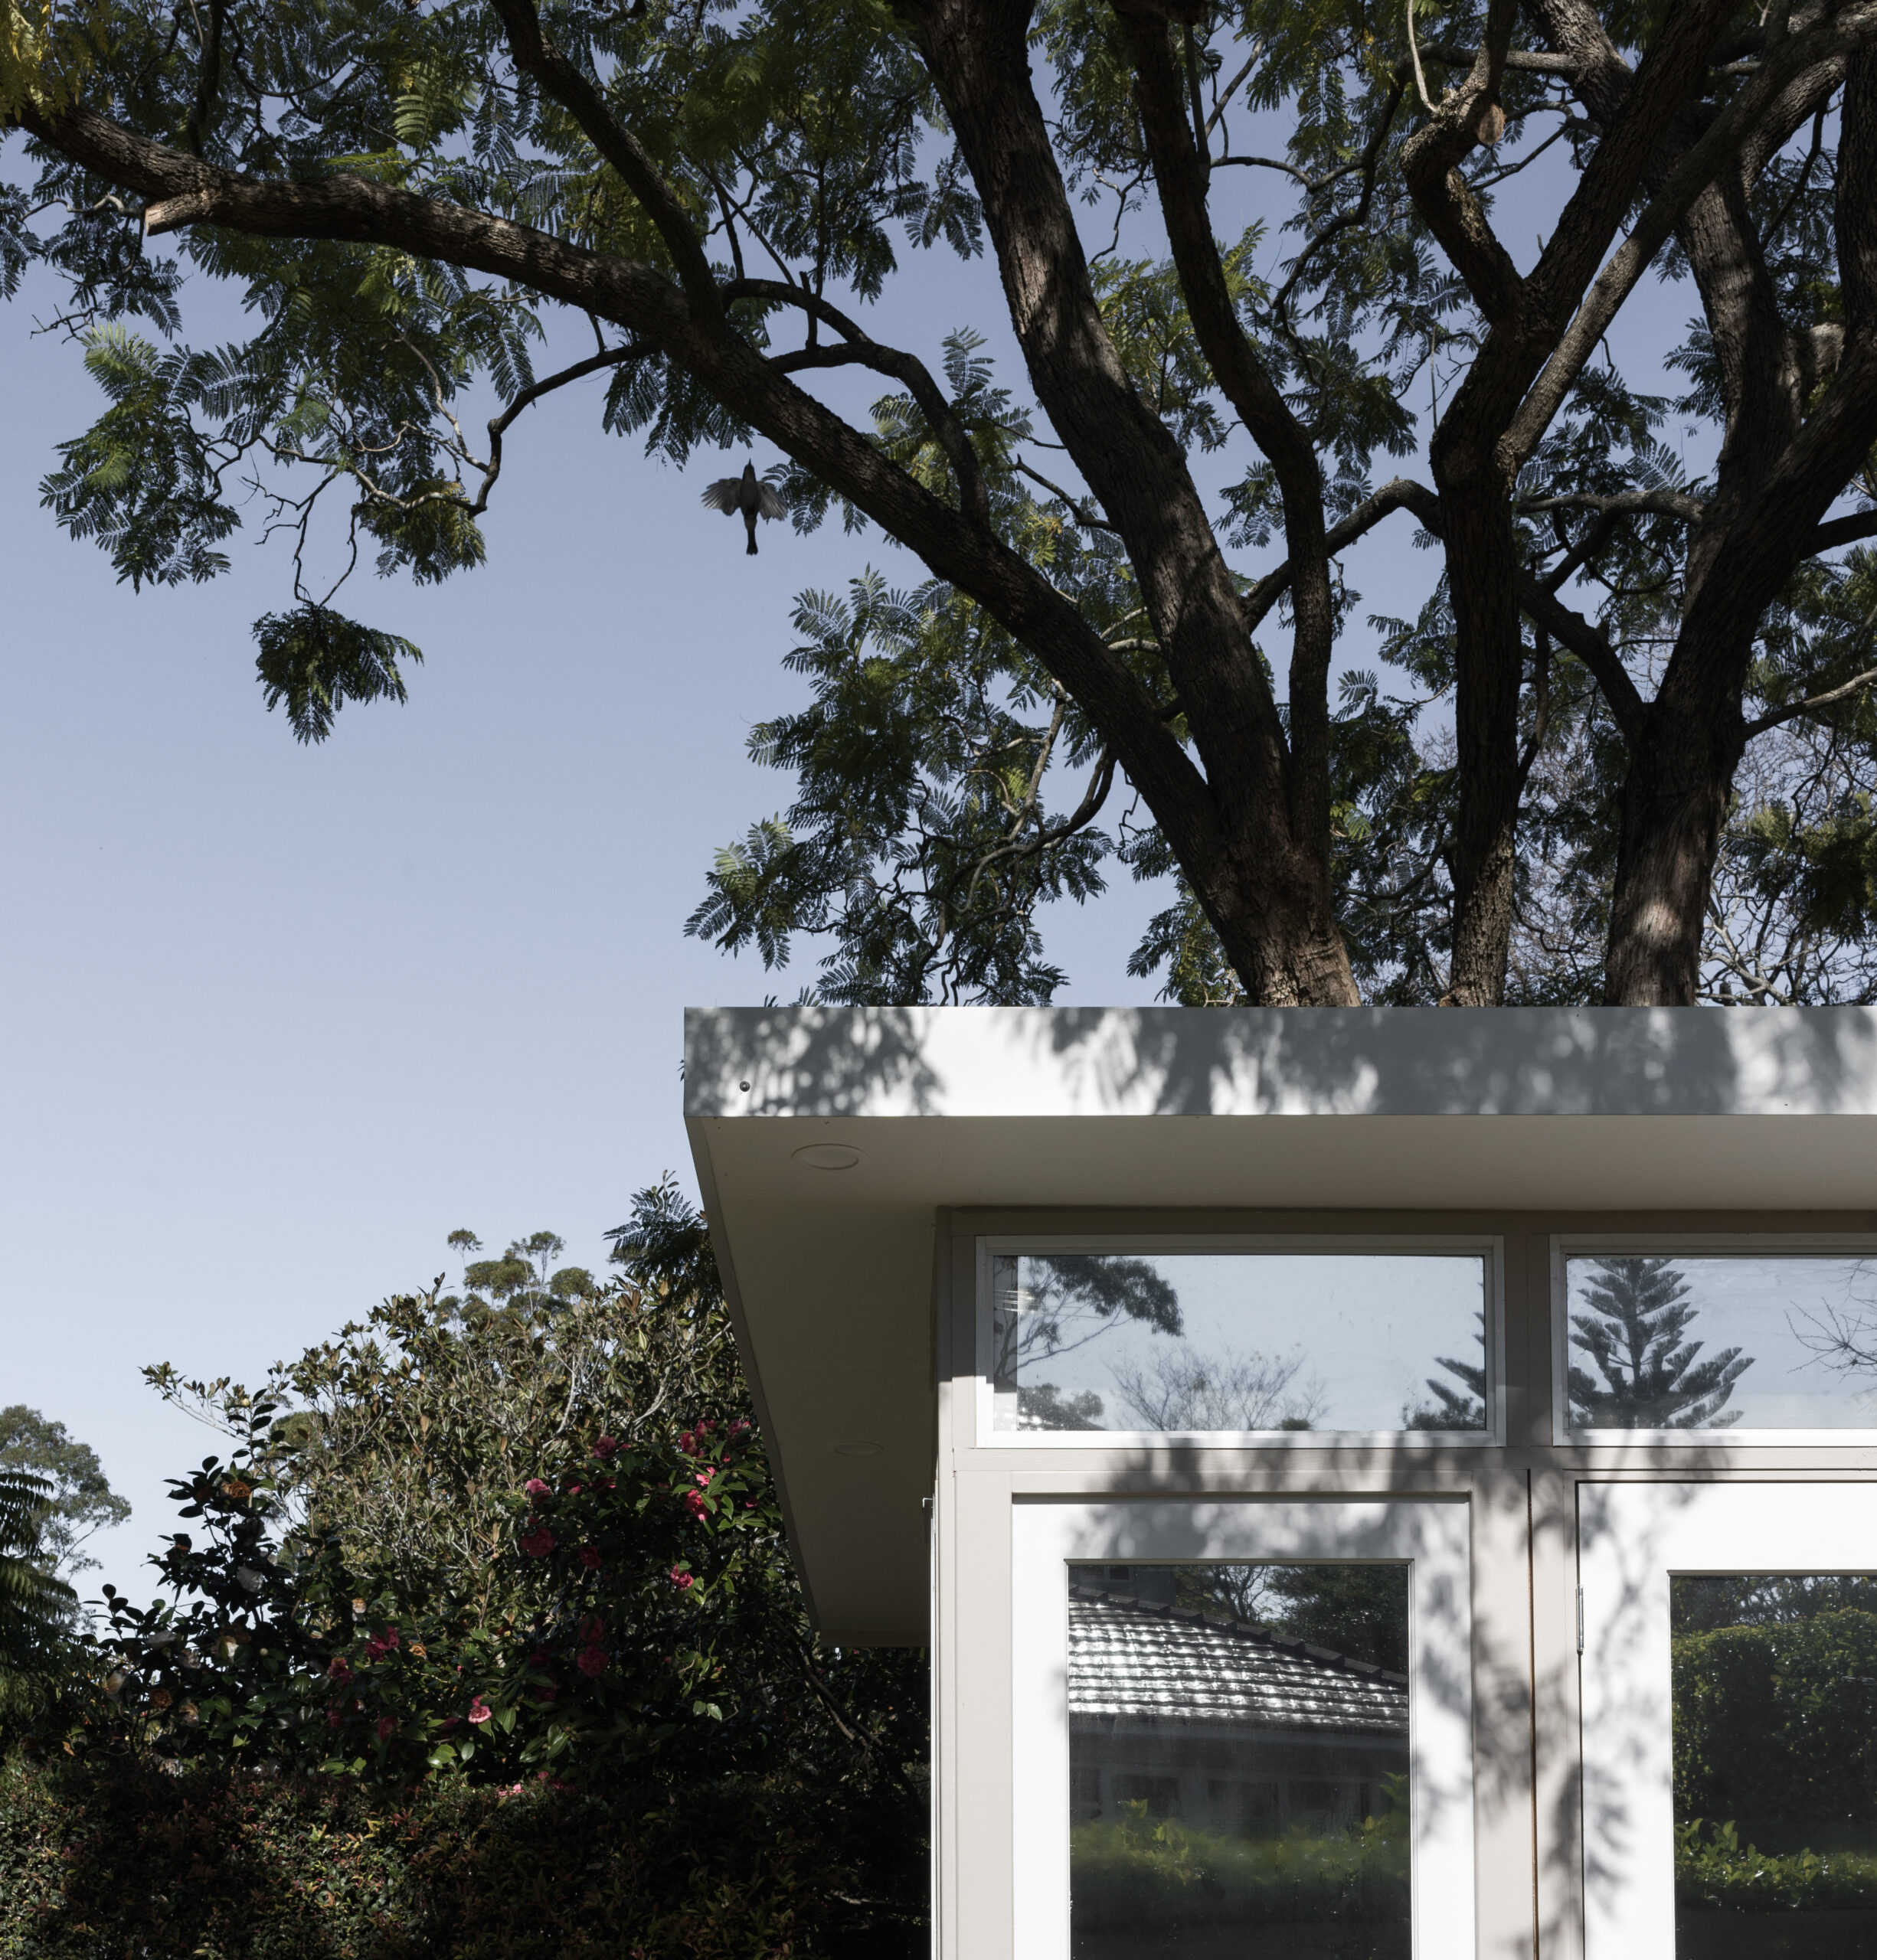
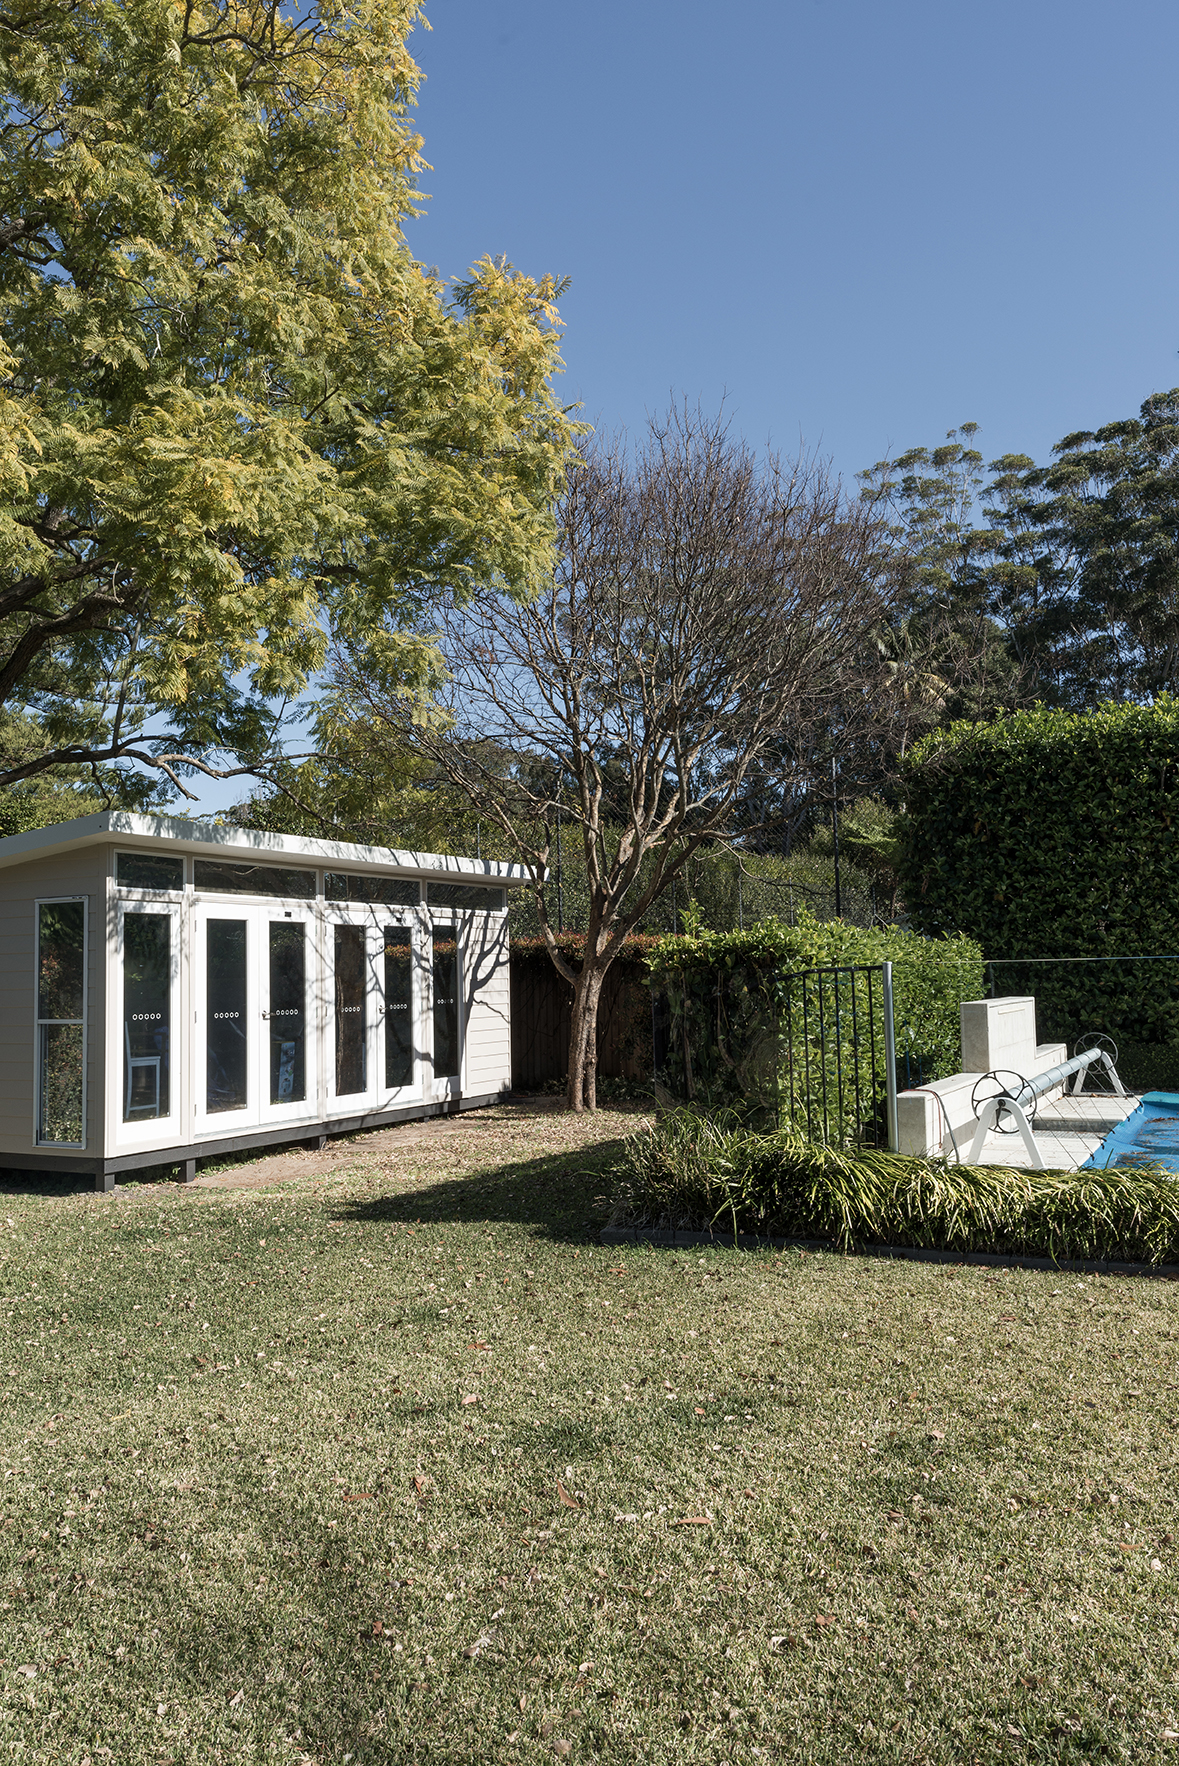
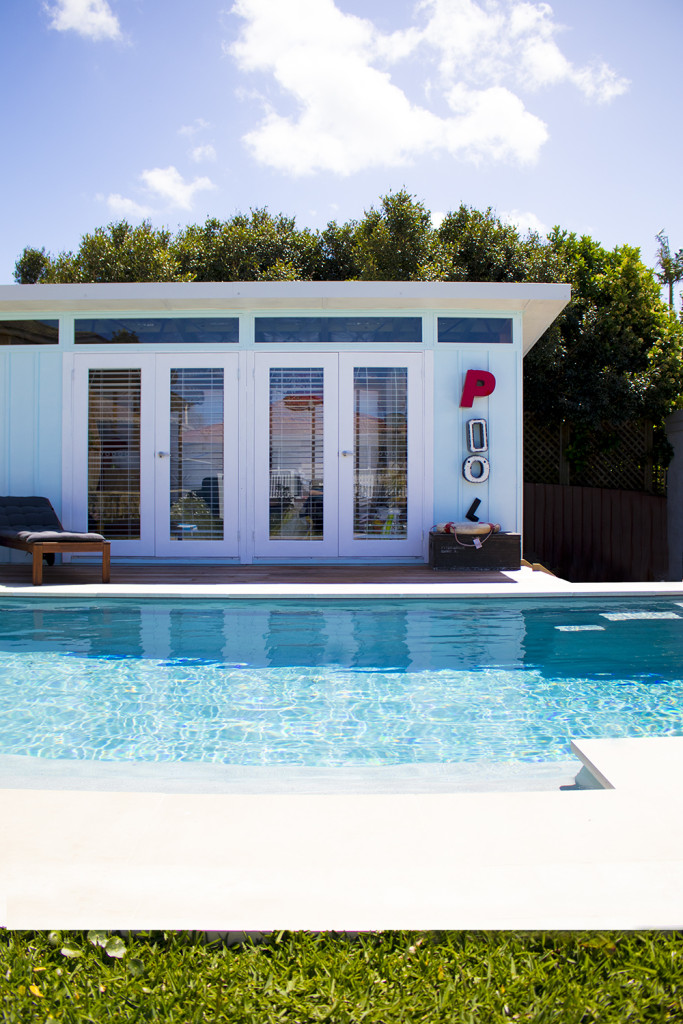
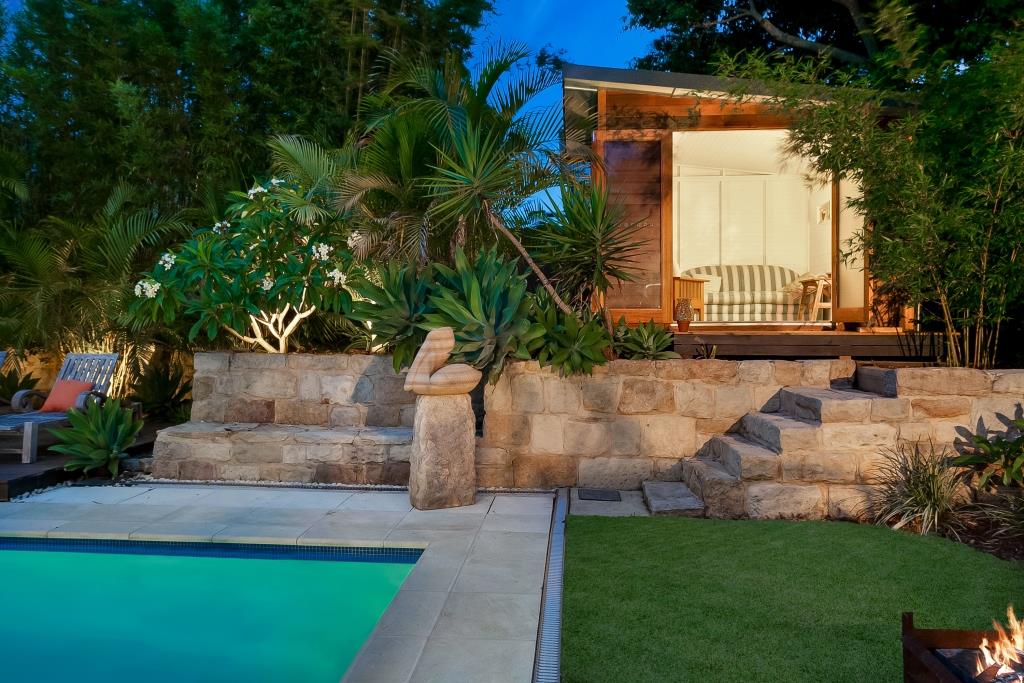
A poolside structure, designed to blend in with the existing house, we love Brooke’s Melwood Mod 20. Brooke purchased her Melwood a few months ago, and couldn’t be happier with her new personalised space.
Absolutely incredible thank you…I couldn’t be happier with the whole process and outcome
Brooke
Brooke personalised her Melwood by adding large glass sidelights & doors across the front, mirroring the rear façade of her home.
Opening on to the manicured lawn behind the pool, this Melwood has given Brooke and her family the extra space they need to enjoy their beautiful backyard.
Currently being used for storage, Brooke is hoping to finish the interiors over the coming months and create the ideal pool room retreat which doubles as a home office.
“I went with Melwood because of the flexibility to move the door & window configuration around our tree, the architectural shape so that I could get the north light in through the top front high windows“
Brooke
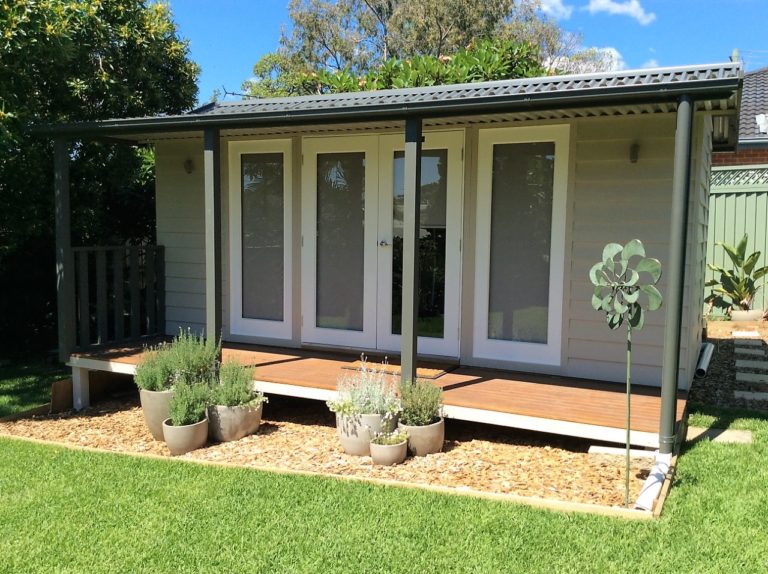
Painted the same colour as her house, Brooke’s Melwood blends seamlessly into her backyard setting.
Brook chose the Melwood Mod Design 20, measuring 6.3m x 3.2m, featuring sustainable pre-primed weatherboard cladding, “White” aluminium windows & Colorbond™️ roofing in “Surfmist”.
Enhance your lifestyle with a Melwood
Book a Discovery Call with one of our Design Solutioneers and start your own Melwood journey today!
Every day now, more and more of us are spending all day at home, juggling the airspace with partners, kids and pets who are also all staying inside.
While we all adjust to this new normal, it’s important to keep some of our daily routines in place. There’s never been a more important time to invest in our mental & physical fitness.
With gyms & fitness centres closed across the country, and winter weather closing in, most of us are finding it hard to fit in our daily workout.
Until now.
Meet the Backyard Home Gym Setup
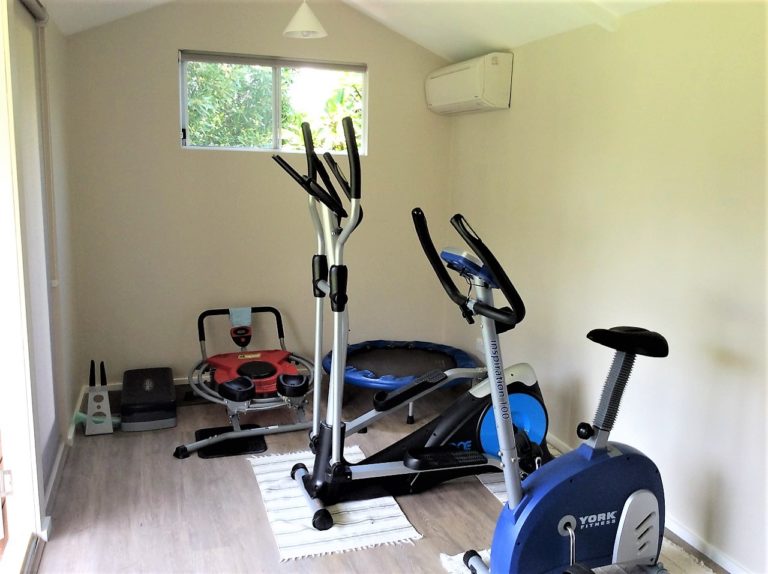
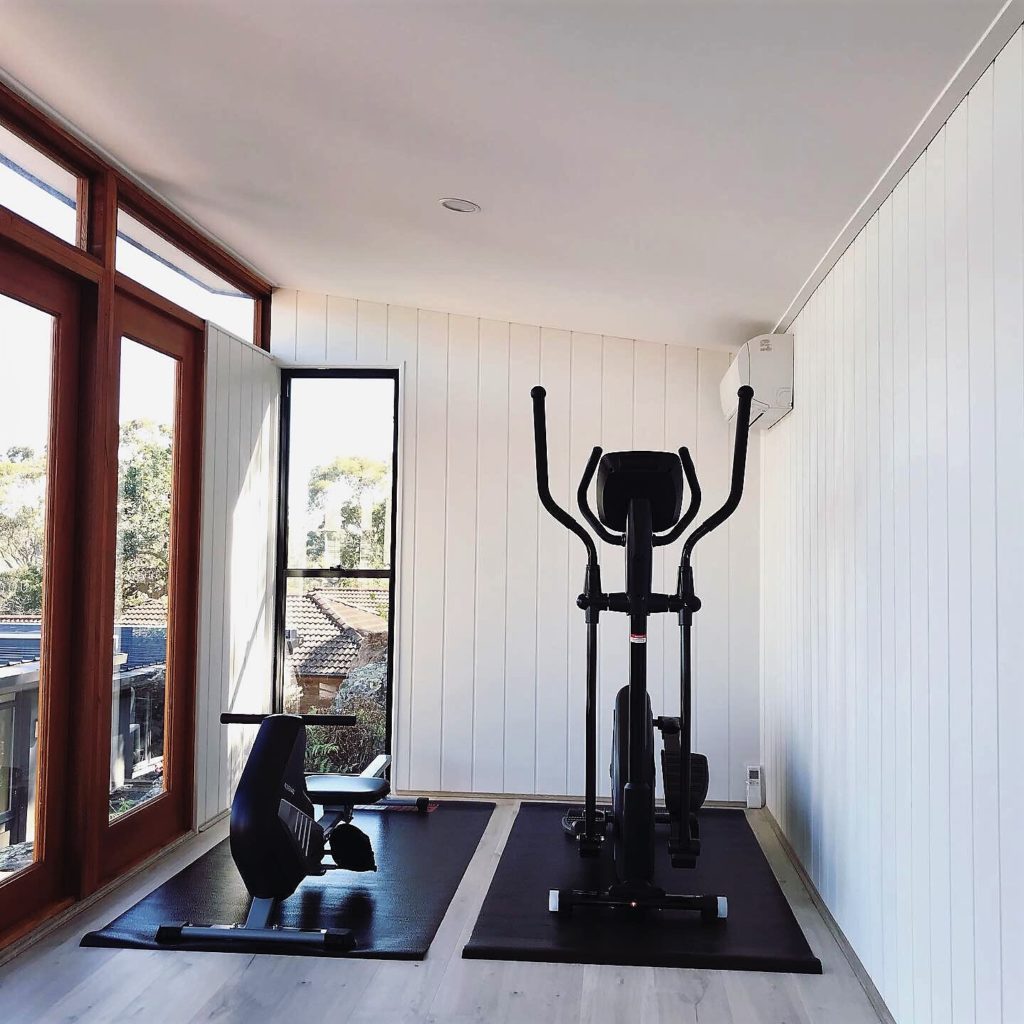
A separate, dedicated space to workout. Away from the noise and distractions of family, and just a few steps from your home.
It’s important to have a dedicated space to set up your Home Gym. This is inside our client’s Melwood Verandah Cabana No.15 in Western Sydney.
The importance of exercise
With the world feeling a bit out of our control, now is the perfect time to take control of our health & fitness by building daily exercise into our schedules.
Regular exercise is essential for supporting healthy immune function, boosting your mood and helping you focus.
A dedicated workout space in your own backyard gym shed
Whether you use a treadmill, weights or simply an app & yoga mat to get your workout done, there’s nothing like having space to work out where you won’t be interrupted by the rest of the family (or have your workout music shared to your husband’s work Zoom meeting)!
Pilates and yoga expert Ellen Barrett recommends creating a comfortable, dedicated space that you can leave set up & ready for your daily workout. “I have a yoga mat always laid out…ready for me to meditate in or do light stretching or do more intense barefoot workouts”.1
Ben’s Melwood Home Gym is the Mod Cabana No.18
This is why a backyard Home Gym setup is so popular with Aussie homeowners. It’s close to your home, but completely separate. You can have your equipment always set up & ready to go, without having to pack it all away to make space for something else.
Carolyn uses her Melwood as a multipurpose Home Gym + Hobby Space. She says “During nice weather, I open up the French doors and overlook the gardens. At other times, I keep it closed, roll up the blinds and still enjoy the lovely outlook. Thanks again for my wonderful cabana!”
Carolyn’s Home Gym is the Melwood Verandah Cabana No.15. At 5.4 x 2.6m, it provides plenty of space inside without taking over the backyard.
Melwood Garden Rooms are secure, sturdy buildings which are built to comply with Building Standards, and comfortable enough to spend time in, year-round! They can be used in a range of ways to suit your family’s current needs. Study space? Home Office? Storage Area? Movie Room – or perhaps a ‘Sanctuary away from the house’ – which is exactly what Ben & his wife use theirs for!
Ben’s home gym is the Mod Cabana No.18. He says “it’s used as a backyard gym mostly, though it also serves as a sanctuary away from the house (and the kids!!)”
Ben’s Home Gym setup: inside the Melwood Mod Cabana No.18
Ready to get started?
We are still open! And ready to help you get your home gym underway.
Building is currently classed as an essential industry, so we are still able to help you with your extra space needs.
All of our buildings are made right here in Sydney, and we don’t rely on overseas suppliers or manufacturers.
We’re ready to deliver and install your garden room with our contactless, one-day service.
Adding a garden room to your backyard is quicker & easier than most people realise.
The whole process can be completed in just a few weeks, and we’re here to hold your hand & show you exactly what to do. Council approval is often not required, making a Melwood Garden Room one of the quickest & easiest home improvements you can do!
The first step is to download the brochure which shows you all designs, sizes & pricing.
Have you ever wondered whether you would be able to put in one of our garden rooms?
Take a look at our recent timelapse video below to find out just how quick and easy they are to setup!
This is an eSpace design 1600 with the eSpace cedar upgrade and double hung windows.
Delivery is available Australia wide* and you can opt for easy DIY or choose a local installer to help set it up for you.
*Delivery is to last point of delivery vehicle access and available for roadside addresses only. Other locations available for extra charge – please enquire today.
Do you ever wish you had a space dedicated to your work?
Somewhere to set up, and be able to focus without distractions. The ability to close the door at the end of the day, knowing that everything will be untouched until you return.
That’s the dream, right?
But all too often, the dream is just that, a dream.
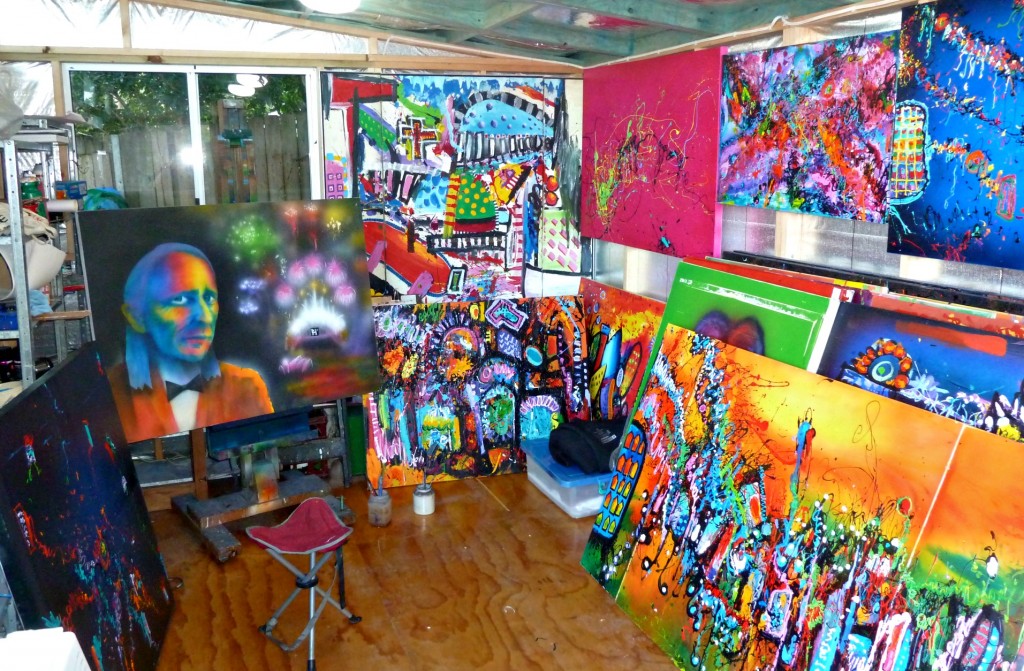
For most creatives, the reality is more like this:
you’re working in the living room or on the dining table. Trying to block out distractions and focus on your work. When dinnertime comes, or the family get home, you need to pack everything away and make room for others. You’re left feeling stressed, and disappointed that you can never seem to ‘get a straight go at it’. It’s an awful feeling.
But it doesn’t have to be that way.
Here’s the secret:
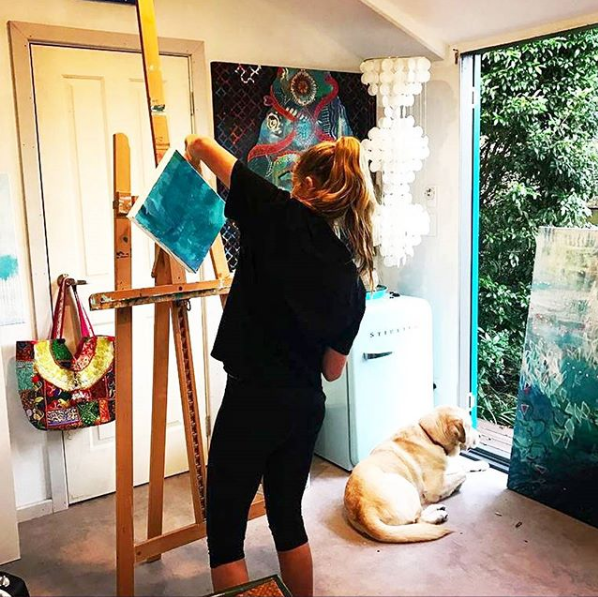
Artists & work-from-home creatives are bringing more happiness, fulfilment and balance into their daily lives by adding a separate studio in the backyard.
This creates a space dedicated to your work. Somewhere you can go to focus, and at the end of the day, close the door, return to your home & be fully present with your family. It creates that essential separation between work & home and improves your happiness in both areas.
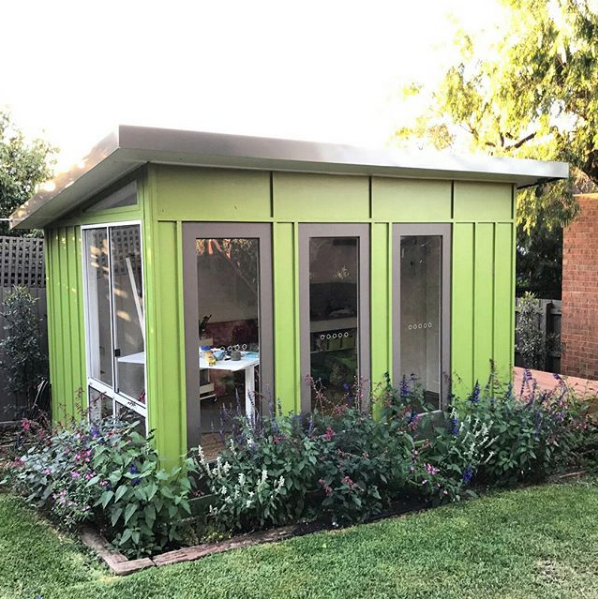
A dedicated studio in your backyard will help achieve work/life balance and improve your property value at the same time. Design: Melwood Workshop 3254
Adding a studio to your backyard is quicker & easier than most people realise.
The whole process can be completed in just a few weeks, and we’re here to hold your hand & show you the way.
The first step is deciding which design & size will suit your property best. Melwood Garden Rooms are made-to-order, so you choose your design & size, and then decide where your doors & windows are going to go. We can help you with this, and provide advice based on the hundreds of other studios we have made just for people like you.
Click here to download our Studio Brochure
By having your studio made-to-order, you know you’re getting a solution that suits both your property & your lifestyle. A dedicated studio is not an expense. It’s a wise investment that you will enjoy for years to come.
Once you’ve downloaded the price list, the next step is to Visit a Display Centre. This is one of the most important stages of choosing your garden room. To be able to step inside the buildings, get a feel for the size and quality, and imagine your own studio, is invaluable. Our team are on hand to show you all your options and answer any questions you may have.
Space to focus, without distractions. Design: Melwood Workshop 3254
And you can have your studio made to suit you, and your property
We want you to have the right garden room for your property. One that maximizes views, looks great and provides enjoyment for years to come.
Once you’ve been to visit a display centre, we’ll schedule in a Site Appointment with one of our estimators. This takes all the stress out of choosing your studio. The estimator will make sure your studio will fit properly in your backyard, and provide advice specific to your property. This will also ensure that everything goes smoothly on the day your studio is delivered!
Here’s how:
If you’re ready to give your work the dedicated space it deserves, with a garden room made just for you, the next step is to fill out this form & download our brochure. We will be in touch in the next few days to answer your questions and help you take the next steps to bring your creative studio to life!
Pin the below image to save this post for later.
The secret to achieving work/life balance
Disclaimer-The information provided in this post is general information only. Before acting on this information you should consider the appropriateness of the information, having regard to your own objectives, financial situation and needs. Please consult a professional in the planning field before proceeding with purchases that may require planning approval.
Selected carefully, and built to last, it will be enjoyed by your family for years to come.
To ensure the design is spot on, you need to get its position, size and look just right. Here’s how:
1. Find the perfect spot
Garden rooms can be positioned almost anywhere on your property; ideally somewhere flat and dry.
Most people prefer their garden room to be in the backyard, and position it so the best angle is visible from the house.
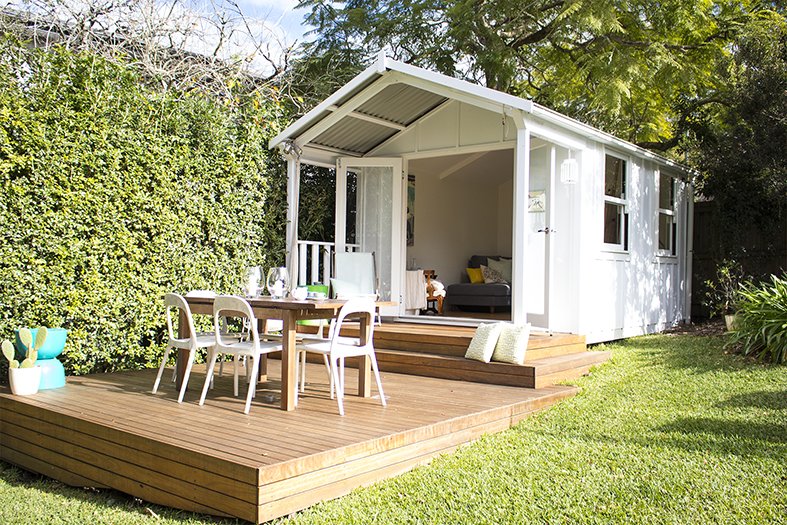
This Cabana replaced a rocky, unuseable area of Danielle’s backyard.
You can also position your garden room to solve other problems on your property; such as:
in a shady area where it’s difficult to get plants to grow
in a ‘dead space’ area of your backyard (like Danielle did!)
so that it blocks a view of an ugly building at the back of the garden
so that it improves privacy within your garden.
Remember to allow space around or behind your building for access and repairs.
Most garden rooms are required to be at least 90cm from the boundary, which gives you enough access down the side.
[intlink id=”3047″ type=”page”]Click here for more information about council exemptions.[/intlink]
2. Plan & proportion
As a general rule, your garden room should be big enough to be useful and to evolve as your needs change, though not so large it overwhelms your garden or throws too much of it into shade.
As a general rule, it should be big enough to be useful and to evolve as your needs change
The size of your garden room is governed by council regulations, with most structures over 20m2 requiring approval.
To better visualise your garden room’s proportions, we recommend marking out the proposed boundaries with string.
The [intlink id=”1218″ type=”page”]Melwood Pricelist[/intlink] contains all dimensions and prices.
Visiting a[intlink id=”28″ type=”page”] Display Centre [/intlink]will help you visualise your Garden Room, and get an idea of how much you can fit inside it.
3. Select a Style
You need to decide whether you want your garden room to be a key design feature in your garden, or a discreet addition that blends in.
By choosing a design & colour scheme that complements the style of your house, your new garden room will look like a natural extension of the home.
By choosing a design & colour scheme that complements the style of your house, your new garden room will look like a natural extension of the home.
Traditional pitched-roof homes, common in areas like Mosman and Neutral Bay, often suit a [intlink id=”5458″ type=”page”]Verandah[/intlink] or [intlink id=”5446″ type=”page”]Porch [/intlink]Cabana.
Modern, coastal homes, in particular those of the Northern Beaches and South Coast, look great with a Mod or Espace Design.
The Mod Design complements modern,coastal homes
4. Door & Window Placement
When planning your garden room, consider where you would like doors & windows placed.
Melwood Garden Rooms are made-to-order.
You choose the number of doors & windows, and where they go in your building.
Double Doors & Sidelights create a ‘full glass wall’ look, and a wide opening.
Popular options include:
Double Doors & Sidelights – to create a ‘full glass wall’ look, and a wide opening.
Sliding Aluminium Windows – great for if you have a desk or other furniture to go underneath.
Sliding ‘ventilation windows’ – these small, discreet windows are often added to the back wall of a cabana, as they let in light & fresh air, whilst leaving plenty of useful wall space underneath.
Design Tip: try to aim for symmetry in your door & window placement. This makes the garden room look more centred and is easy on the eye.
The highlight windows in Andrews Workshop let in alot of natural light. The double glass doors provide a nice wide access.
5. Garden details
Once you’ve chosen your garden room, consider adding outdoor lights and planting to complement it.
You may also want to factor in a decked area to increase your outdoor entertaining space.
You may also want to factor in a decked area to increase your outdoor entertaining space.
Pin the below image to save this post for later.
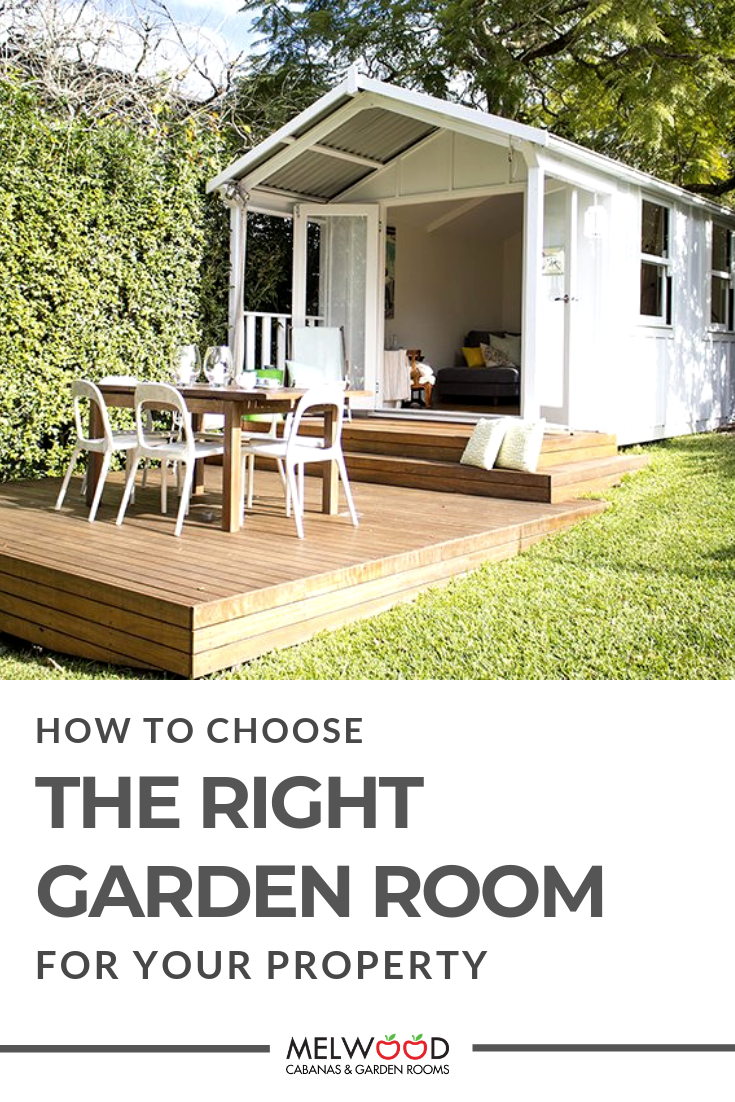
how to choose the right garden room for your property
Inspired by the many talented artists who have designed & purchased Melwood backyard art studios, we’ve curated a list of Art Studio design tips!
From window & door placement to functional furniture, find out everything you need to know to design a space that will get the creative juices flowing!
Tip 1: Window & Door Placement
When designing your Melwood art studio, you are able to have as many doors & windows as you like, and you can choose where they go!
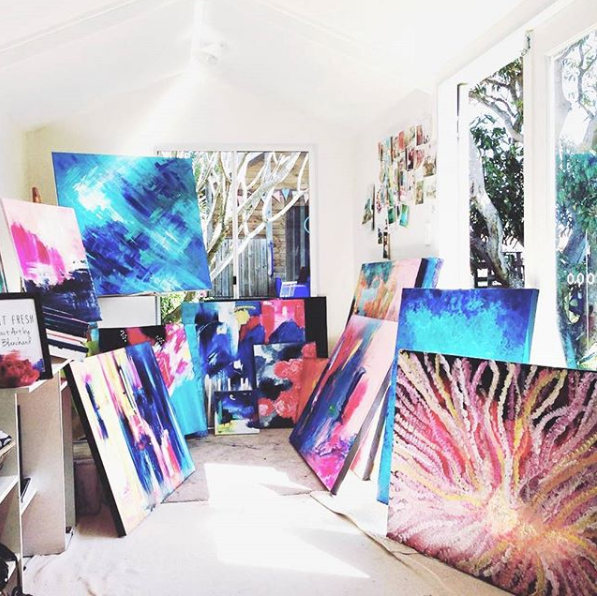
One of the most important factors for any creative studio is natural lighting.
Whether it’s for photography, art or even pottery, natural light is king!
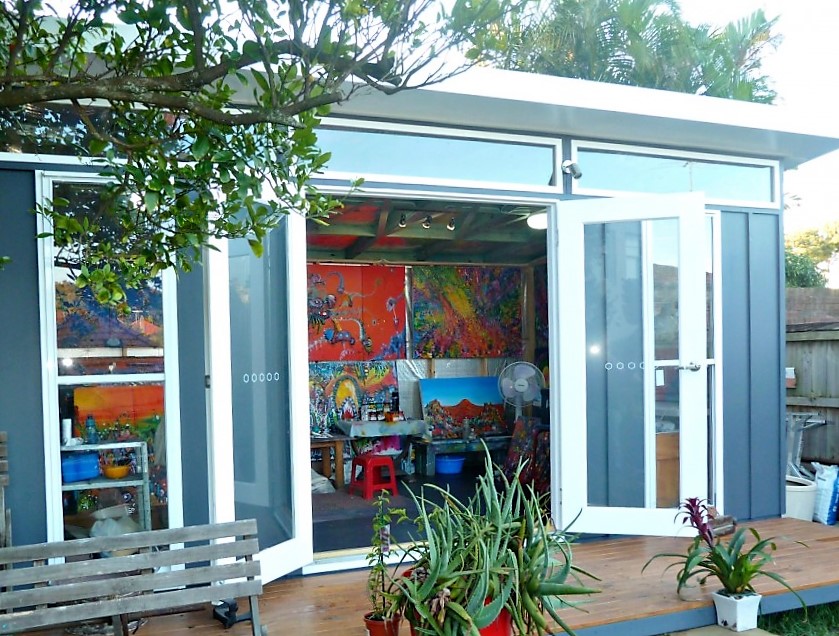
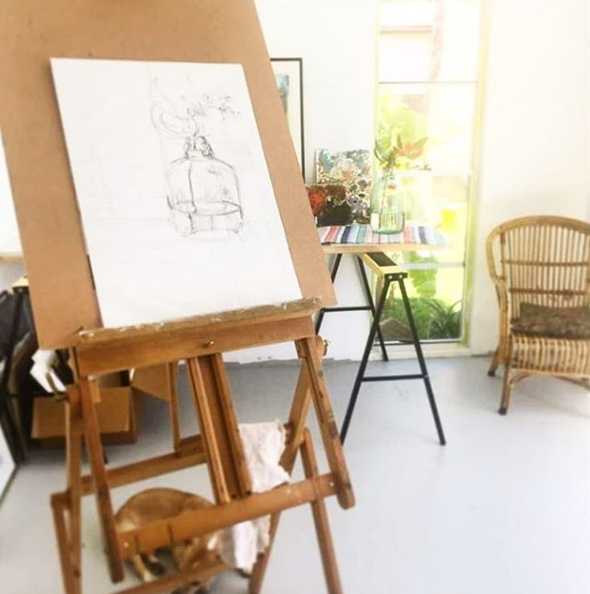
This makes our Mod Design very popular for Art Studios, as the ‘highlight windows’ let in a lot of natural light.
Highlight windows provide natural light for David’s Art Studio
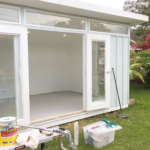
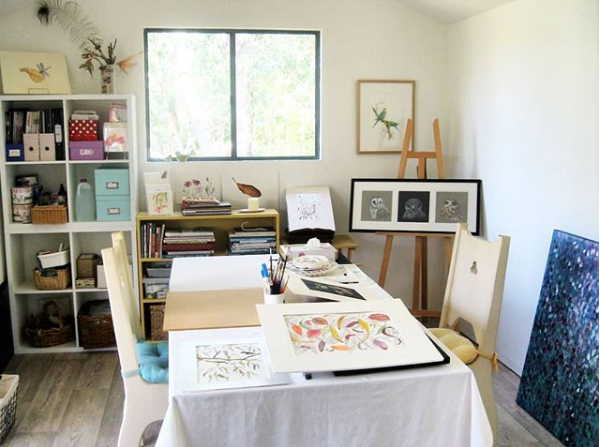
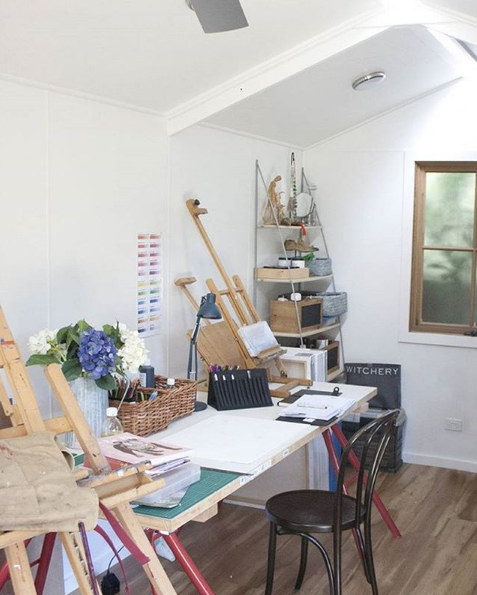
Traditional plasterboard has been used to line the walls in this Melwood art studio
Kerri’s studio features plasterboard walls painted a crisp white
Plywood Wall Lining
Plywood wall lining is easy to DIY and comes in a range of different finishes.
Using plywood walls and then painting them a crisp white creates a beautiful ‘blank canvas’ for a colourful, creative space.
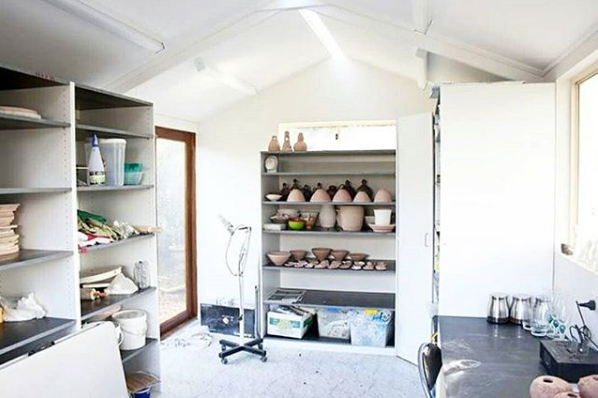
Or, you could even paint a mural onto your plywood walls!
Painted plywood wall lining provides a crisp white look for this pottery studio
Tip 3: Clever Flooring Options
Your new studio comes with an unpainted smooth plywood floor.
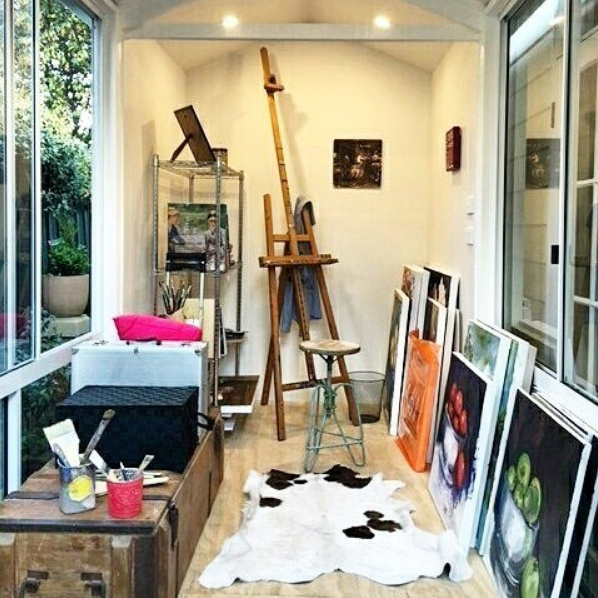
A popular option for art studios is to seal the floor with a lacquer. This brings out the natural patterns in the wood beautifully and creates a protected, but smooth floor for your studio.
Another bonus; if you change your mind later, it’s easy to add a different flooring type on top!
If you prefer a different floor option, you can add any residential flooring options on top of this: think carpet, carpet tiles, floating timber floorboards, laminate.
Staining the plywood floor that your Melwood Studio comes with is a fast (and pretty) option!
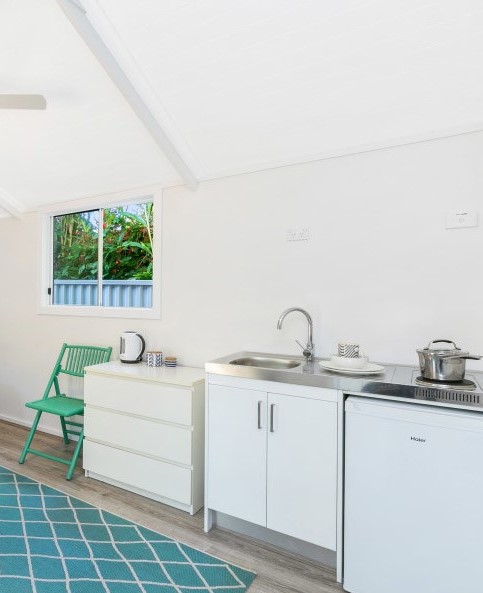
Tip 4: Add a Sink
A simple sink and tap in your art studio will make all the difference when it comes to cleaning up!
After your Melwood Studio is installed, you can get a plumber to connect a bathroom or sink up for you.
It’s important that you engage the services of a plumber after your Melwood site inspection and before your studio is installed.
This will allow them to do any prep or groundwork required beforehand.
Not sure who to use? No problem – we can recommend a plumber to you.
A simple sink and tap in your art studio will make all the difference when it comes to cleaning up!
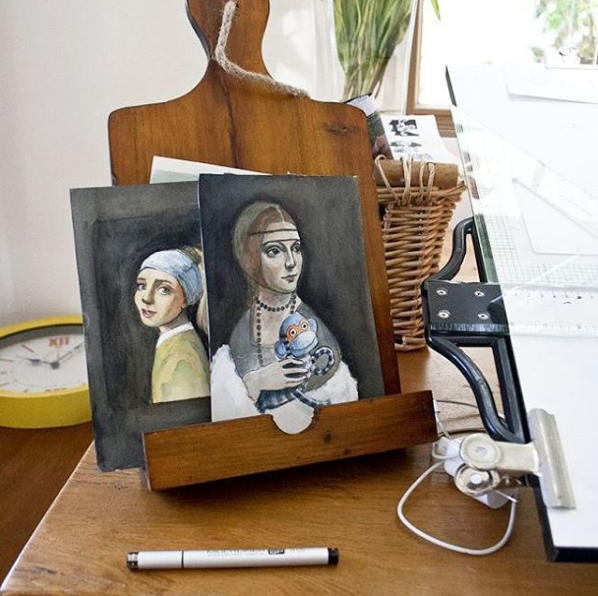
Tip 5: Add Functional Furniture for storage & display
Last but not least, add a few pieces of carefully-selected functional furniture to your studio as a final touch.
Shelving
Shelving is excellent in an art studio for both storage and display.
Categorizing supplies by item type into baskets will make them easy to find (and easy on the eye!)
An Art Studio provides a place to escape the world around you & focus on what you love most.
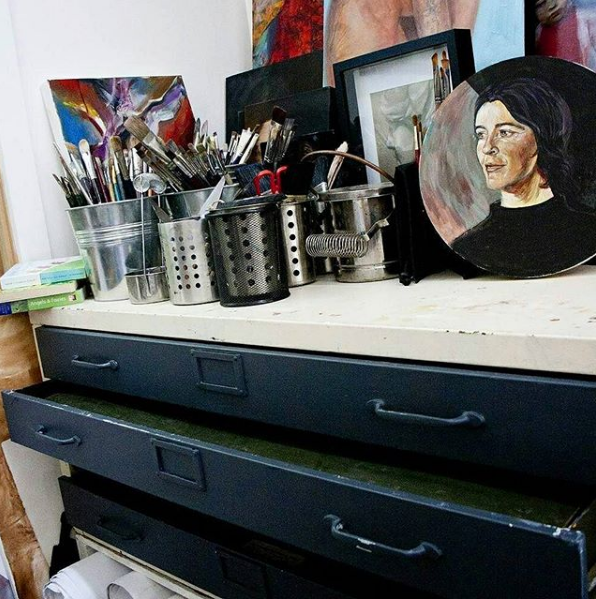
A dresser
Not just for inside the house, a dresser is a very functional piece of furniture for your studio!
The drawers can be used for neat storage, with artwork and paintbrushes displayed on top.
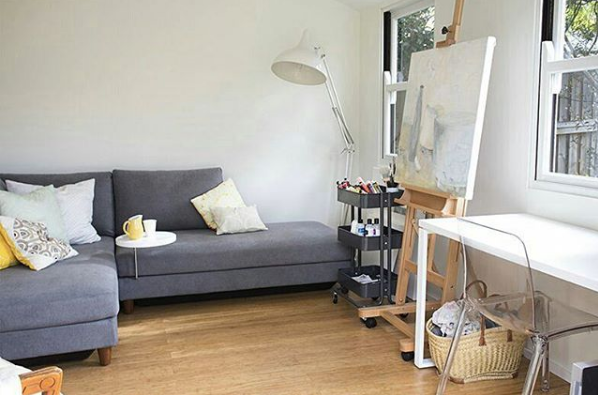
Comfortable Seating
Lastly, a few comfortable seats will turn your studio into an inviting space where family and friends can relax.
A seat, a throw and some cushions will make your studio even more relaxing.
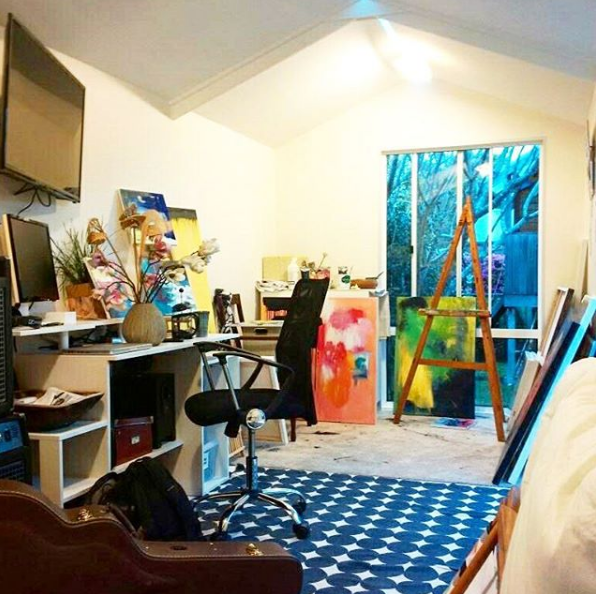
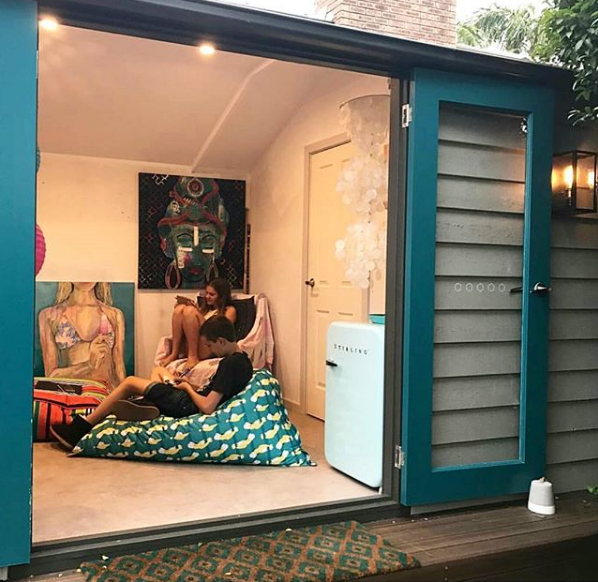
Claudia’s studio has a large lounge and a few single seats, creating plenty of space for family & friends.
Having your own dedicated art space may even inspire other family members to pick up a brush!
(Perhaps the trickiest thing will be keeping the studio to yourself)
@kimberlygreenart’s daughter getting creative in the studio
Bean bags turned Kimberly’s art studio into ‘Christmas Planning HQ’ for her kids last year! @kimberlygreenart
@kimberlygreenart “It’s sooooo great to be able to make a mess and walk away. My art has definitely improved with this space.”
A portable storage caddy
A rolling storage caddy is a great studio addition.
This allows you to move your supplies and easel to the best light throughout the day.
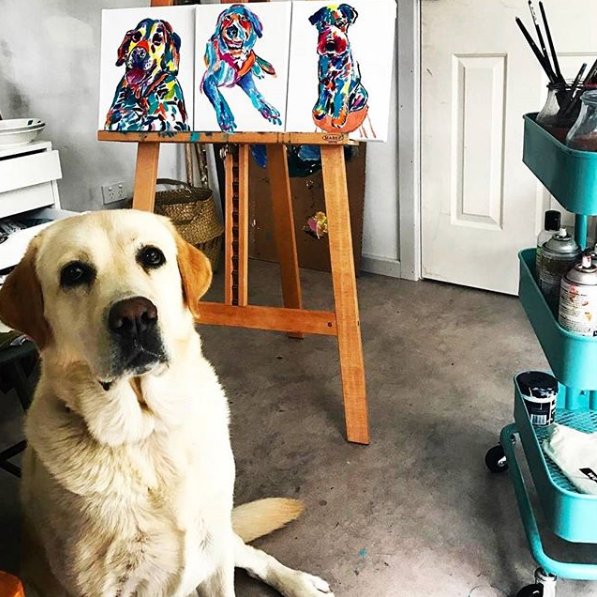
The pawfect assistant! @kimberlygreenart ‘s handsome lab enjoys spending time in her studio
How to get your own backyard Art Studio
All photos in this post are of Melwood Art Studios – decorated and fitted out by their very talented and creative owners!
Bring your outdoor area to life this summer with a Hamptons-style space that is designed to impress!
With the right use of textures and colours, paired with carefully-selected furniture and finishes, you’ll have an outdoor room that will feel like a coastal retreat all year long!
1. Start with a spacious, airy room that can open up to the outdoors
Try to add as many doors and windows as you can to your garden room to make the space really ‘open up’.
French doors that fold back flat against the building are a great choice, as they also allow easy access (for getting all your stylish furniture inside!).
A popular combination is to add french doors + ‘fixed panels’ either side. This creates a ‘full glass wall’ look, and a nice open feel, without the expense of sliding doors.
For the other walls of your garden room, it’s a great idea to add ventilation windows. These clever little stunners are nice and wide, but only 30cm high, so they are perfect for positioning at the top of the wall. This allows you to put shelving, furniture or even a TV on the wall below, and still have the sunlight & ventilation of a window! #winnerwinnerchickendinner
Adding double doors + sidelights to your garden room really opens up the space
2. Natural textures & finishes
The crisp, raw look of natural wood, paired with soft linen and bright whites is what creates the inviting Hamptons vibes we all love so much. By choosing the right textures, you can make your outdoor room both stylish and practical.
For the external cladding, both Board & Batten and Cedar are great options. Both materials are extremely durable, and designed to endure the Aussie weather.
Cedar is also a great natural insulator, so if you’re looking to reduce heating/cooling costs, this is the way to go.
Internally, gyprock painted a crisp white is a great base for your room. Or, for a more beach-shack look, pre-fabricated wall panels are the way to go. These stunning panels save time and can be a fun DIY project!
When choosing your flooring, a pale floating timber floor will complement the room whilst being practical (easy to clean!).
Alternatively, you could just stain the ply floor that comes with your Melwood Garden Room, and then add texture with a rug. Not only is this fast and easy to DIY, it looks great!
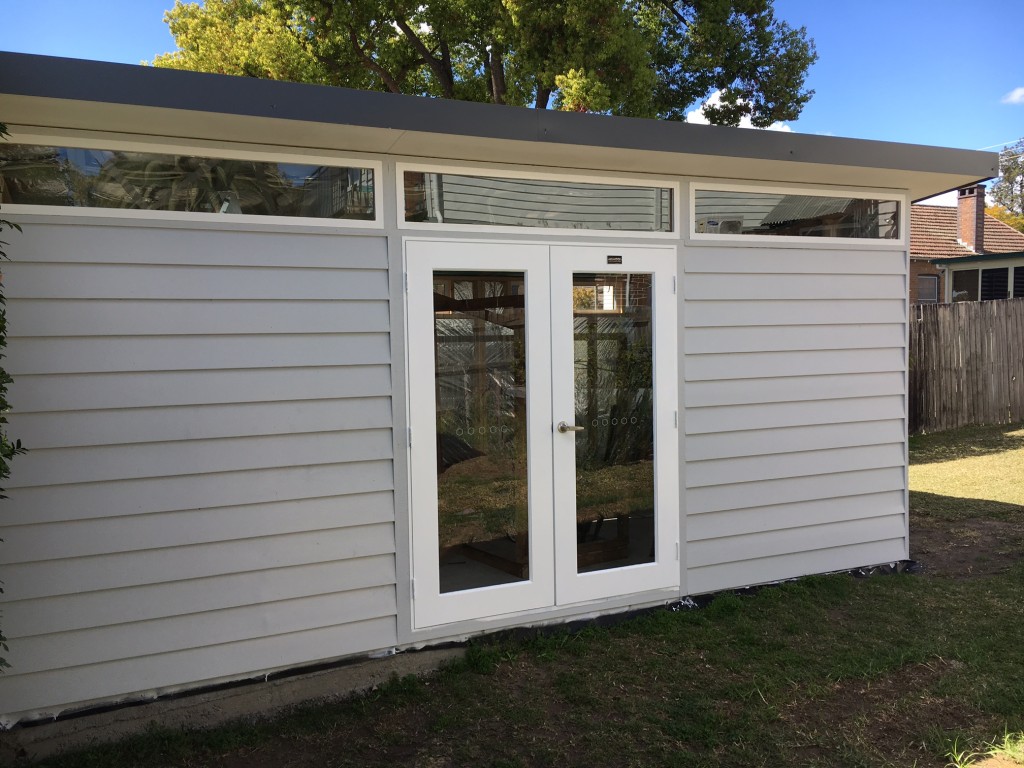
Board & Batten cladding painted a pale grey, with white feature doors and windows creates the perfect Hamptons look in Helen’s backyard.
Stained floors paired with a blue and white rug = a fast, easy & stylish DIY flooring option.
3. Crisp neutral colours
The Hamptons trend focuses on a refreshing palette of greys, bright whites and natural wood finishes; creating inviting spaces that are easy on the eye.
Popular paint colours include Dulux Shale Grey and Taubmans Snow Drop.
Make sure you are using an exterior grade paint for the outside, as this will seal and protect the wood, whilst providing long-lasting colour.
When painting the external walls grey, white trims (doors and windows) will complete the look. Alternatively, go for all white everything and keep your soft greys for inside.
For the roof, Colorbond’s Surfmist or Woodland Grey are the two colours that work best with the Hamptons palette. Woodland Grey is an excellent choice because it doesnt show as much dirt as other colours, whilst the Surfmist has the added benefit of reflecting the heat in the hot summer months.
Claudia’s all-white garden room is the perfect contrast to her decking area.
Shale grey walls, white trims and a woodland grey roof create the ideal hamptons palette in this gorgeous Sydney backyard
4. Styling your Outdoor Room!
Now for the really fun part! Styling your outdoor room!
Here’s where you can really showcase your personal style.
Start with pared-back basic elements (furniture) in whites and neutrals and then add colour in cushions, artwork, rugs or other decor items.
The trick here is to make sure you add just a touch of colour, not too much. You want to keep the overall look as white & bright as possible.
When adding colour, its also a great idea to start with a large ‘centre’ piece like a rug or artwork, and then pull colours from that to influence your cushion and decor choices.
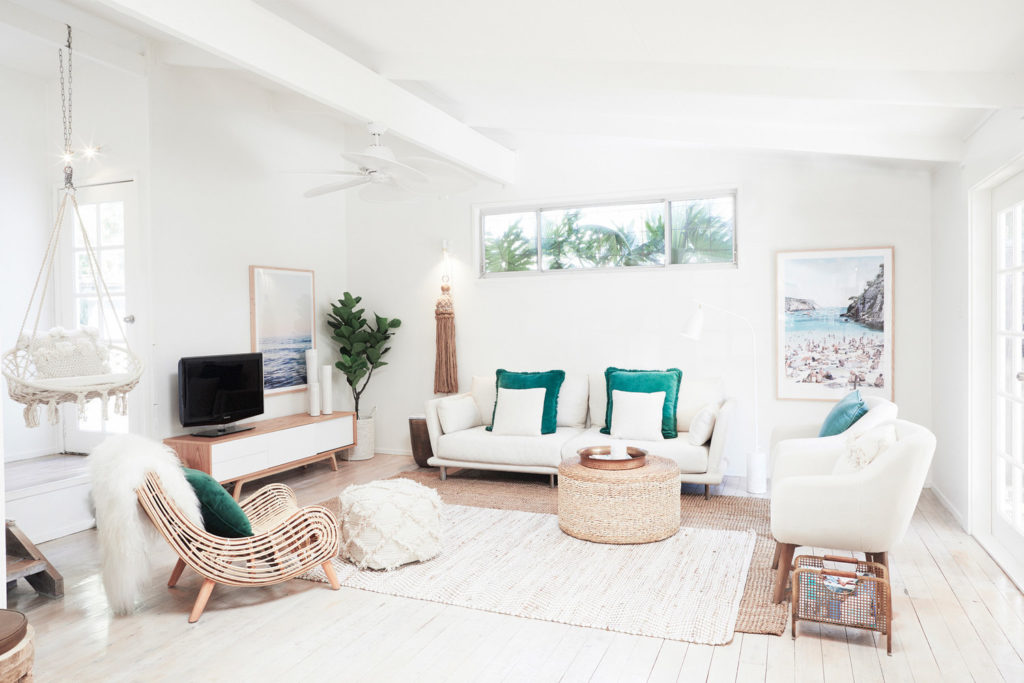
This is demonstrated perfectly here by the gorgeous girls at Three Birds Renos: white-washed floors, white walls, white furniture, with a few natural wood accents and then some gorgeous blue and green colours which have been pulled from the beachy artwork and indoor plant. Isnt it just gorgeous?
Alot of white with a few natural wood accents and then some gorgeous blue and green accents. Perfection.
So, are you inspired to create a Hamptons-style outdoor room?
We’d love to see what you create, and we’d love to help you get the project started!
If you’re designing or renovating an outdoor space, there’s no better way to enhance your pool area than with a Cabana.
Both practical and stylish, this covered area is perfect for entertaining family & friends, and relaxing after a few laps.
Here are four key features to consider when planning a pool cabana.
1. Include as much glass as possible
Double glass doors & sidelights are a fantastic (and very popular) addition to your cabana, creating a ‘wall of glass’ along the front of the Cabana. Not only does this make the cabana light & bright inside, it creates a great ‘supervision’ spot for parents.
Scott & Berni have chosen the ultimate ‘glass wall’ look for their Pool Cabana. This lets in alot of light, whilst also provides easy supervision of the pool area from inside. (Mod Design No.18)
2. Comfortable Seating
Add some comfortable lounges to make the Cabana the perfect place to relax. Opt for thick, durable materials that can easily be wiped down, and will be durable enough for post-swim relaxing! Ottomans are another great way to add more seating to the Cabana.
Comfortable seating and lighting make this pool cabana perfect for entertaining, day or night! (Melwood Mod Design No.12)
3. Connect to services
Your cabana can be easily connected to services after it is installed. This will allow you to add lighting, a bar fridge + sink and even a bathroom!
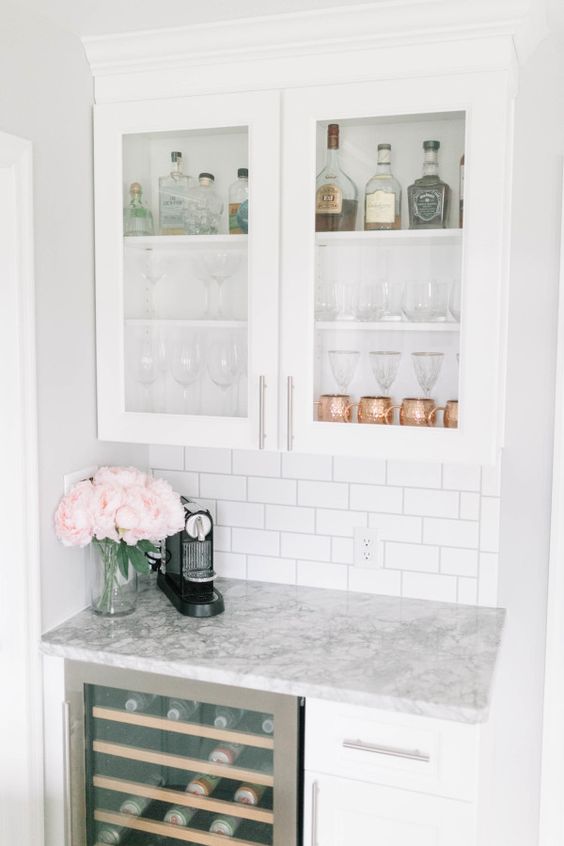
Glam it up with cabinetry, shelving and a touch of marble. Girls night in, anyone? (Source: stylemepretty)
4. Keep Refreshments Handy
Some shelving, cupboards and a mini sink are all you need to create a refreshments bar in your Pool Cabana. Entertaining is about to become a breeze!
Less is more: this chic little bar area is the perfect addition to your pool cabana, where guests can help themselves to refreshments. (Source: Pinterest)yp
5. Section with an internal wall
Adding an internal wall is an excellent way to create a separate storage area for pool equipment and toys. You can also add an external access door like Alison has in her Cabana.
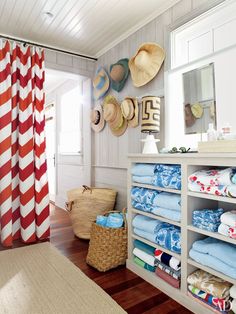
This can be as simple as adding a dividing curtain to your cabana, creating a private space to quickly change right by the pool. Add some hooks for hat storage, and shelving for spare towels and you’re all set!
A simple dividing curtain, wall hooks and shelving create the ultimate poolside change room. (source: pinterest)
Imagine impressing family and friends with your own stunning pool cabana!
All it takes is 5 easy steps to get a Cabana on your property. We’ll walk you through the process.
Most people need more space and don’t know how they can achieve it.
This has become a major problem particularly in and around Sydney, where the ever-inflating property market means that many families cannot afford to move to a bigger home.
The Nichols* family from Sydney’s Lower North Shore added this stunning outdoor room to their property, dramatically increasing their usable space in just a matter of weeks.
“Their Melwood Cabana No.18 measures a luxurious 5.4m x 3.2m and has been styled to match their house perfectly.”
Melwood’s prefab portable structures make it quick and easy to add affordable space to your property.
Whether it’s your garage, rumpus, hallways or even study that need de-junking, there’s usually plenty of spare room in your house that is not being used to its full potential and emptying it into a backyard shed, cubby house or cabana is the quickest and easiest way to recover that space!
“claim back space inside your house by moving items to the backyard.”
So how can you do it?
Start by downloading the product guide which contains all styles, dimensions, pricing and options.
This is great for getting an idea of your preferred design and size before visiting the Display Centre to view them in person.
Then visit Melwood’s Display Centre to see the designs for yourself and get an idea of the size and quality of build.
“The design this family chose was the Verandah Design No.18 with no verandah. They then added Cedar Upgrade, double doors with sidelights, and custom double doors.”
One of Melwood’s Site Estimators can come to the property to discuss options, check measurements and assess the site for you.
Fast-forward a few short weeks while your order is manufactured in Melwood’s Sydney factory, and it’s time for the setup!
The trained teams from Melwood deliver and setup the structure (to lock up stage) in just one day!**
“At the end of the day, this family had a secure, lockable building, ready to decorate.”
Now for the fun part!
We recommend you paint the doors immediately and the rest of the outside of your new Melwood structure within a week. This is to seal and protect the wood.
Once that has been completed, its time to tackle the inside!
“The Nichols’ family have stained the tongue-and-groove ply floor that their Melwood structure came with, and added a gorgeous navy and white rug. This is an excellent idea, as it saves the time and expense of professional flooring, and can easily be a DIY project.”
If you are adding lights or electrical, you’ll want to arrange this before you add the wall lining.
For the walls, they have used Interior Wall Lining Panels. These are a fast, neat and easy alternative to traditional plaster.
Then move your items/furniture in and your new space is ready to enjoy!